1 The Servicing Plans window
Open Servicing Plans from the Patches menu. The window shows all current servicing plans. Click Create Servicing Plan in the left menu to make a new one.
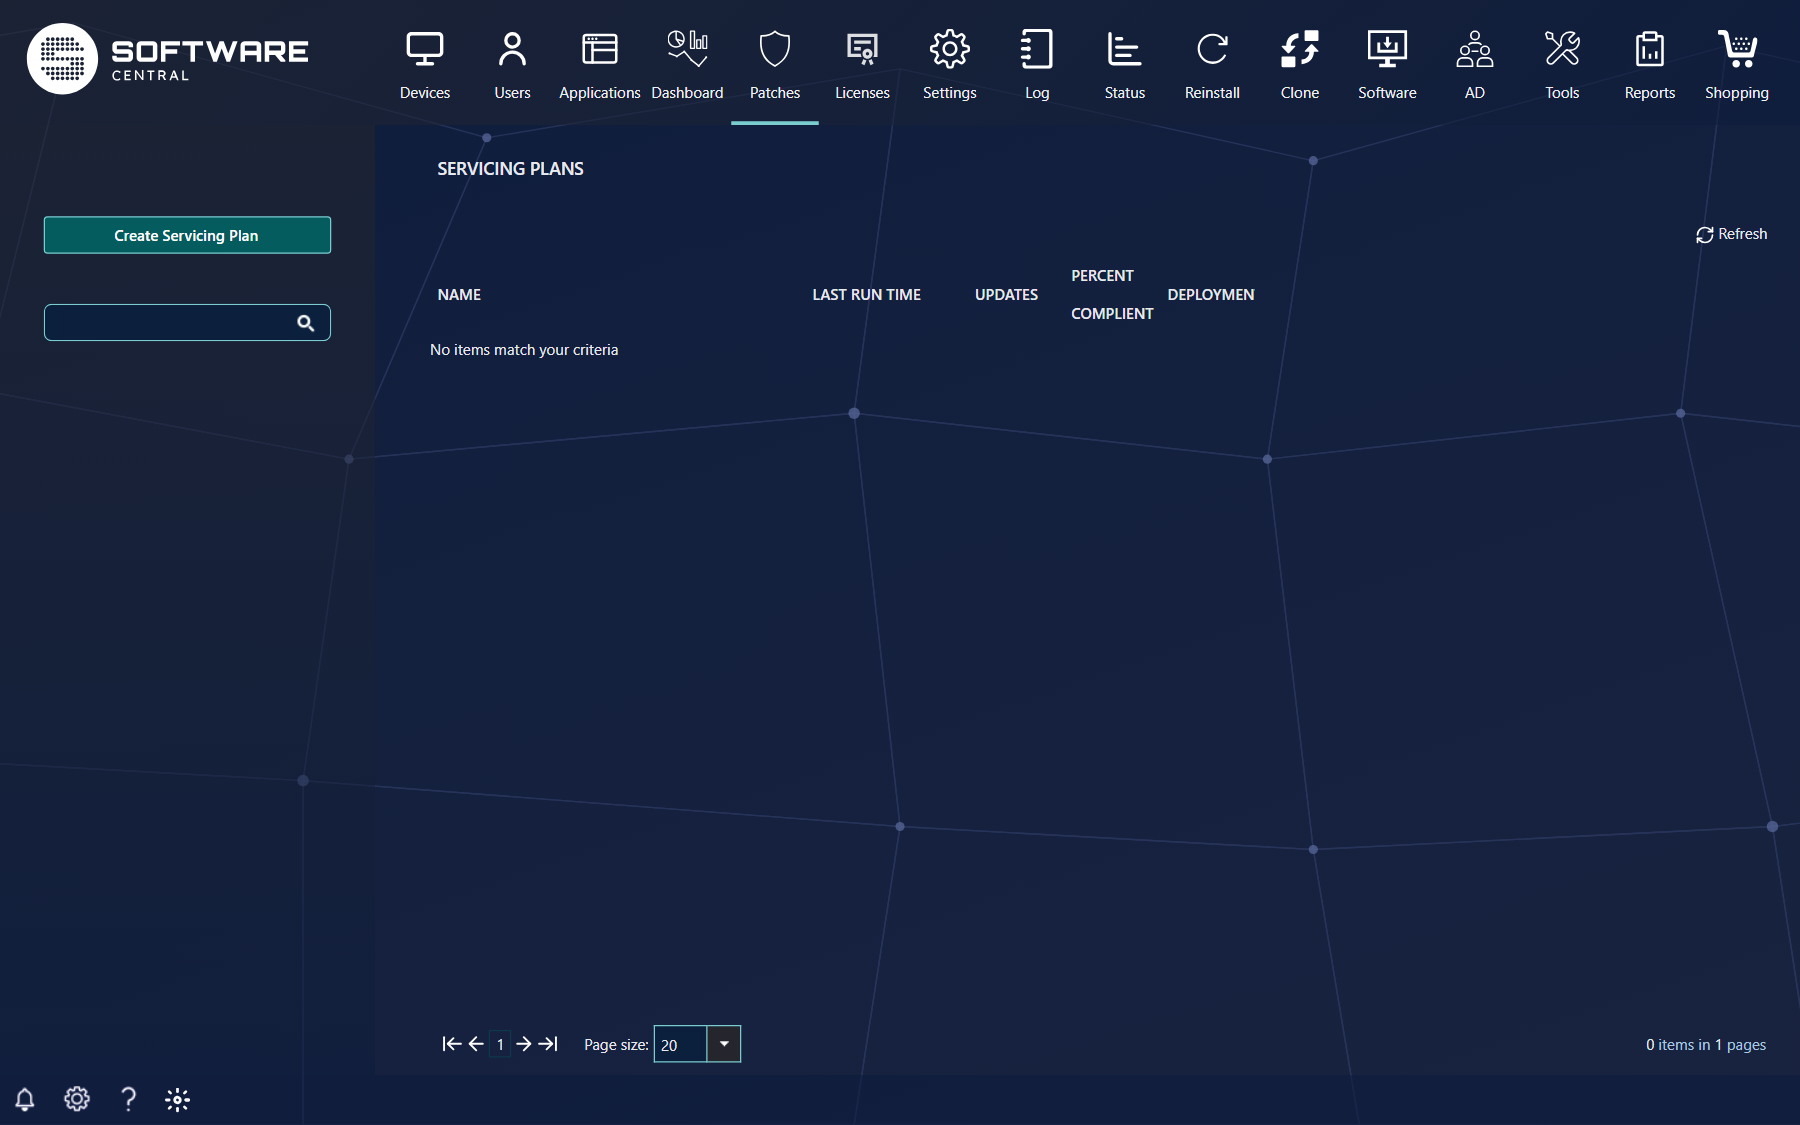
Each plan is one row. The row shows the plan's Name, Last Run Time, Updates, the percentage that is compliant, and the number of Deployments. The links on the right are Status, Deploy, Run Now, Disable (or Enable), Edit and Delete.
The Status and Deploy links appear only when the plan has a software update group. Until SoftwareCentral finds that group for the plan, these two links are hidden.
2 Create a Servicing Plan
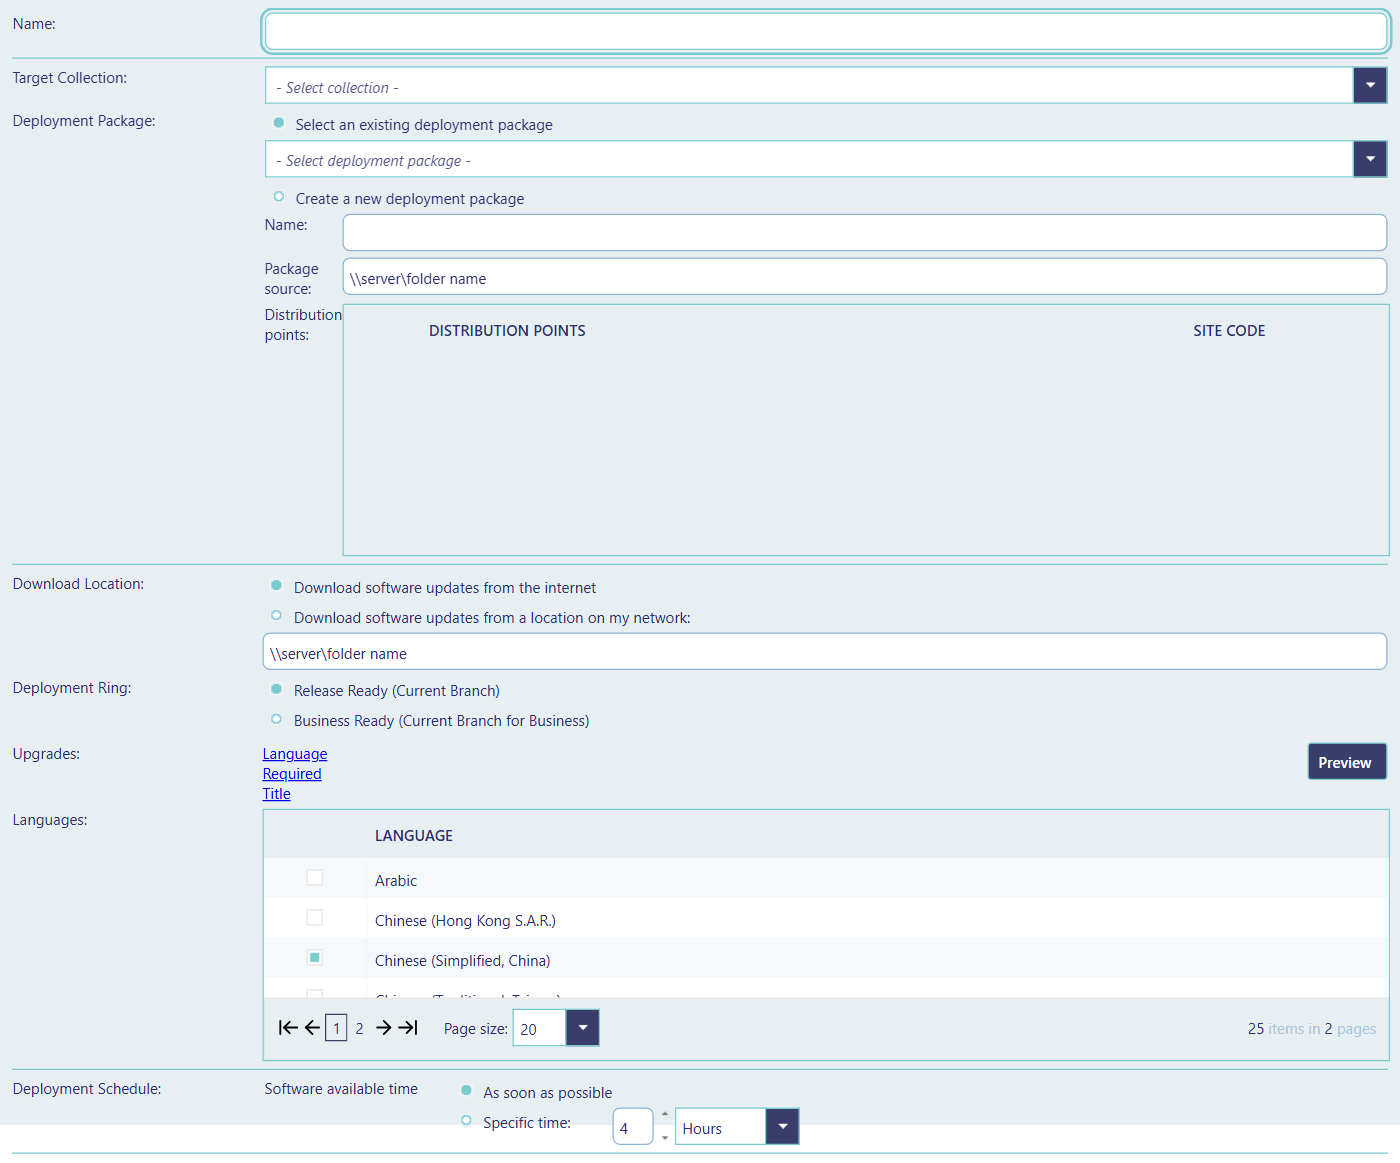
To create a Servicing Plan, click Create Servicing Plan in the left menu. A new window will open.
Name
Start by giving the Servicing Plan a suitable name. The name must be unique among the servicing plans.

Target collection
Next, select the target collection containing the computers you wish to upgrade. This can be a test collection; you can deploy the Servicing Plan to another collection later (see Deploy to another collection).

Deployment package
Next, you can select an existing Deployment Package or create a new one. The Deployment Package will contain the files for the upgrades.
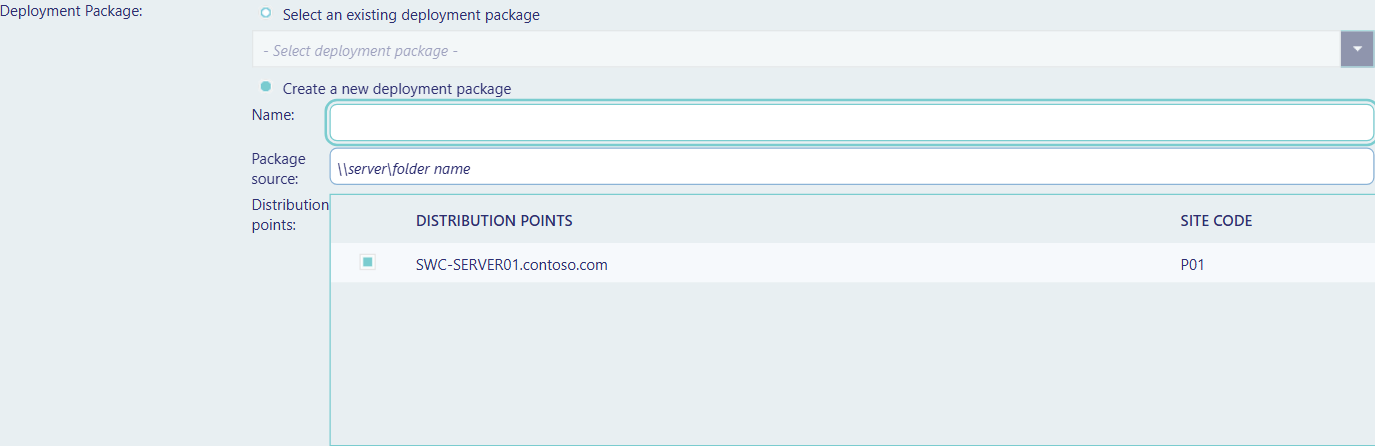
In this example, we create a new Deployment Package.
The new Deployment Package must be given a name, and a share to download the files to. Enter the share in Package source, for example \\server\folder name.
You must also select the Distribution Points, where the package will be distributed to. The distribution points are ticked in the grid. You can distribute the Deployment Package to other Distribution Points from the Deployment Packages interface.
Download location
Next you must choose the download location. If the server does not have access to the internet, you can choose to download the updates from a location on your network. Select Download software updates from a location on my network: and type the location in the box below it.

Deployment ring
Now you must choose the Deployment Ring. The Deployment Ring refers to the Windows readiness state. You can choose between Release Ready (Current Branch) or Business Ready (Current Branch for Business). Release Ready (Current Branch) is selected by default.

Upgrades and filters
Now you can select which upgrades to include in this Servicing Plan. The Upgrades row has three links, Language, Required and Title, and a Preview button.

Click on the links to apply filters.

In this example, we will only download upgrades in English which is required by at least one device and matches our Windows Enterprise edition.
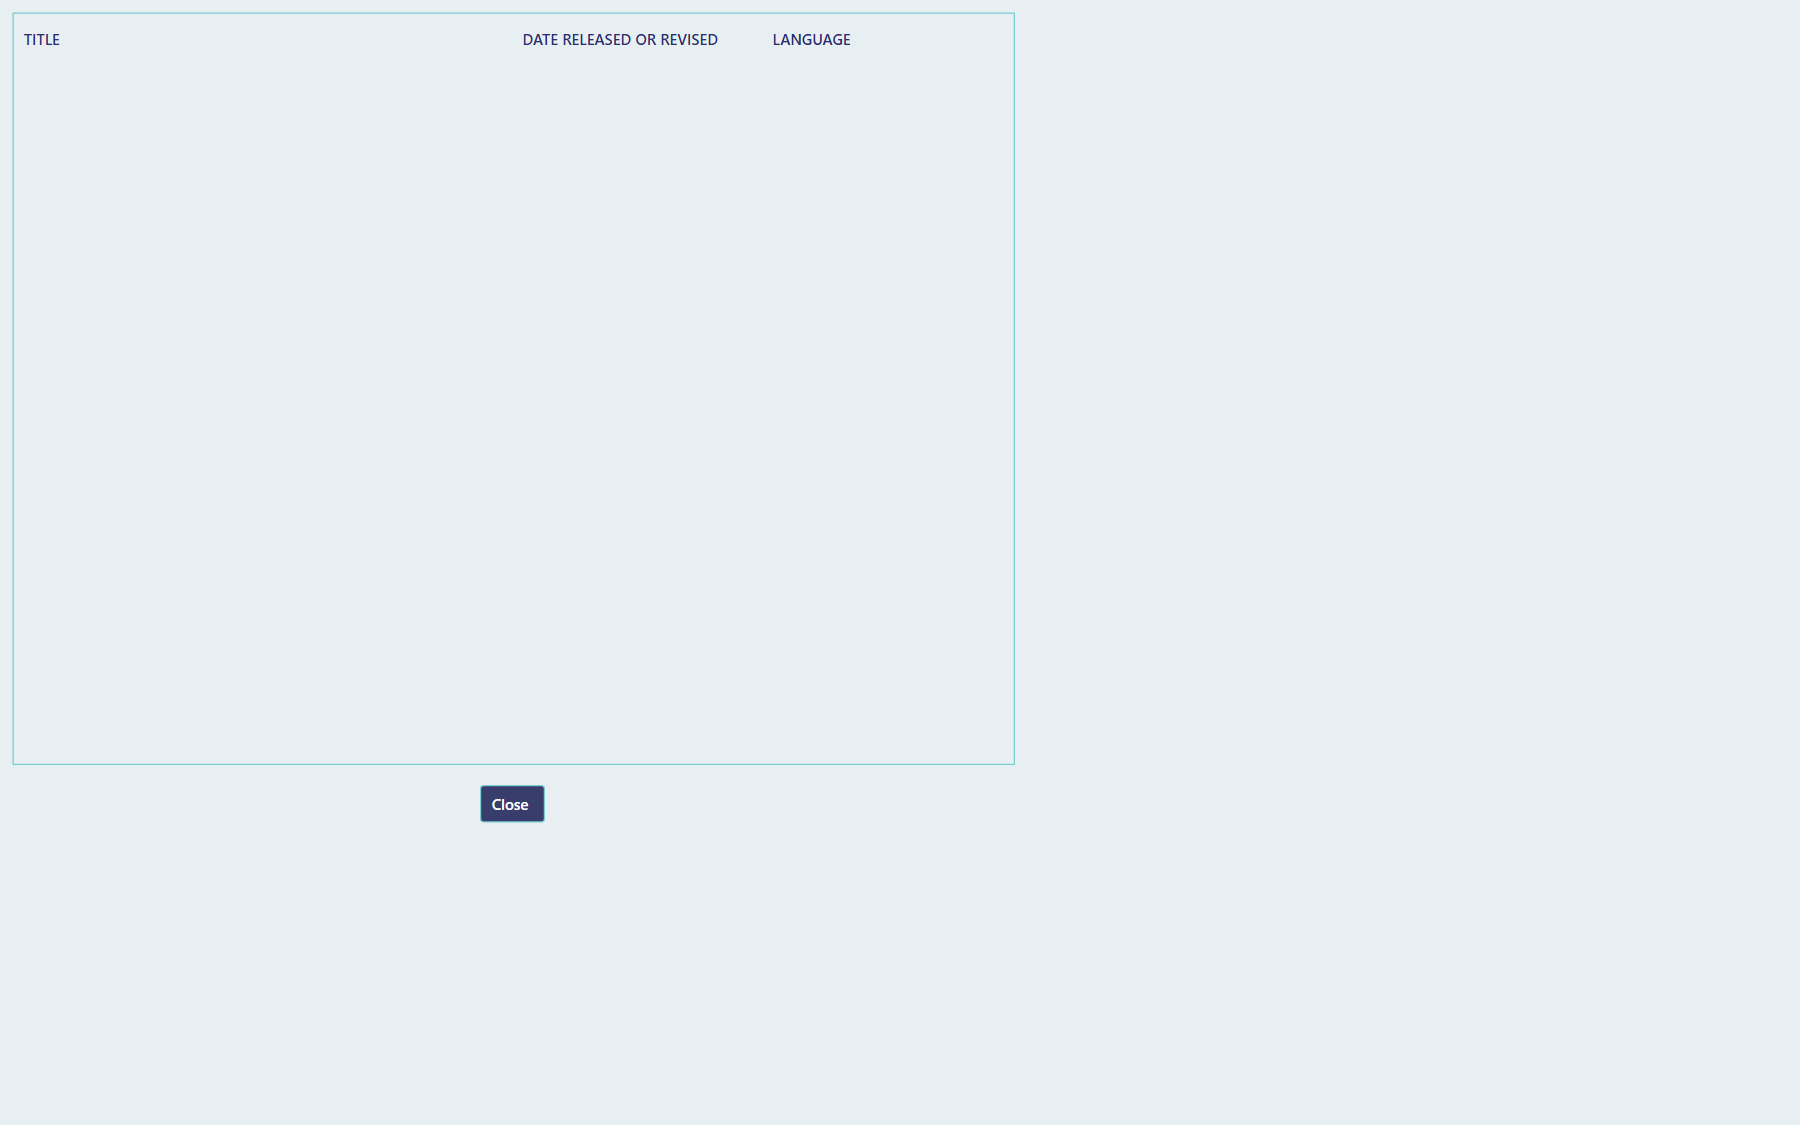
Click on the Preview button to the right, to see which upgrades will be downloaded. The Preview window lists each upgrade with its Title, Description, Date Released or Revised and Language.
Languages
Next you can select the languages. The languages of your WSUS subscription are pre-selected with your default settings.

Deployment schedule
Finally, set the Deployment Schedule. The option Software available time is set to As soon as possible by default. You can choose Specific time: and then a number with Hours, Days, Weeks or Months. The window offers 4 Hours as the value for a specific time. You should set the Deployment Schedule to 4 hours, to allow the files to get distributed to the selected Distribution Points.

You can now click Create. If the Servicing Plan is saved with no problems, the window will close and you can see the new Servicing Plan from the main interface.
3 Run Now, Status and Deploy
You can trigger the Servicing Plan to run immediately by clicking on the Run Now link on its row.

Note that the Status and Deploy links first become available when SoftwareCentral has created the software update group for the plan. This may take several hours after the files have started to download.
4 Edit
You can click the Edit link on a row to change other settings for your Servicing Plan.

5 Deploy to another collection
You can deploy a Servicing Plan to another collection by clicking the Deploy link on its row.
A new window will open, where you can select the new collection. Enter a Deployment Name, choose the Target Collection and choose the Type of deployment: Required or Available. The window shows the number of collection members when you select a collection. Click Deploy to create the deployment.

6 Installation status
You can see a list of all targeted devices and their installation status by clicking the Status link on the plan's row.
You can see status for each deployment of the Servicing Plan, by choosing it in the Deployment drop-down. You can also apply a filter to only see clients with a specific state, by choosing the state in the Enforcement State drop-down.
The grid has the columns Computer, Deployment Name, Available, Deadline and Last Enforcement State. Use Refresh to update the list, or the export icon above the grid to export it to a file.
You can also go to the Windows 10 Servicing interface to see other status information.

7 Enable, disable and delete
Disable stops a plan from running without deleting it. A disabled plan shows Enable instead. While a plan is disabled, Run Now is not available and the Deploy link is hidden.
Delete opens a window that asks Are you sure you want to delete the plan's name. Click Delete in that window to remove the plan, or Cancel to keep it.
8 Best practice
- Deploy to a test collection first. The plan can target a test collection; deploy it to the real collection with the Deploy link once it works.
- Choose only the languages you need. The ticked languages in the Languages grid are the content languages the plan downloads. The Language link in Upgrades filters the upgrades by language; add it only when you want that filter.
- Tick the distribution points when you create a new package. The new package is distributed to the ticked points when the plan is created. You can distribute it to more points later from Deployment Packages.
- Disable a plan to pause it. Disabling keeps the plan, but Run Now is unavailable and Deploy is hidden until you enable it again.
- Give each plan a unique name that says what it is for. A second plan with the same name is refused, so a clear name also helps you tell the rings apart.
9 Troubleshooting
| Symptom | Cause | What to do |
|---|---|---|
| “A name is required.” | The Name box is empty. | Enter a name for the plan. |
| “A servicing plan with this name already exists.” | Another plan has the same name, ignoring capitals. | Choose a different name. |
| “A target collection must be selected.” | No Target Collection is chosen (in the create window, or the Deploy window). | Select the collection. |
| “A download location is required.” | Download software updates from a location on my network: is selected but the location box is empty. | Enter the location, for example \\server\folder name, or choose the internet option. |
| “A name for the deployment package is required.” | You chose to create a new package and left its Name empty. | Enter a name for the package. |
| “Deployment package name already exists.” | A package with that name is already in SoftwareCentral. | Choose the existing package, or give the new one a different name. |
| “A source path for the deployment package is required.” | Package source is empty. | Enter the share that holds the package files. |
| “Failed to create deployment package. See the log for details.” | The package could not be created in Configuration Manager. | Open the Log, find the entry for the failure, and correct the cause before you try again. |
| “Deployment Package is missing.” | No existing package is chosen. | Select a package in Select deployment package, or choose Create a new deployment package. |
| “Failed to create servicing plan. See the log for more details.” | The plan could not be saved to Configuration Manager. | Open the Log, find the entry for the failure, and try again. |
| “A deployment name is required.” in the Deploy window | Deployment Name is empty. | Enter a name. |
| “Failed to deploy Software Update Group. See the log for more details.” | The deployment could not be created. | Open the Log, find the entry for the failure, and try again. |
| “Failed to delete servicing plan. See the log for details.” | The plan could not be deleted. | Open the Log, find the entry for the failure, and try again. |
| “No items match your criteria” in the list | There are no servicing plans, or the search matches none of them. | Clear the search, or create a plan. |
| Run Now is greyed out | The plan is disabled. | Click Enable on the row, then run the plan. |
| Status and Deploy are missing from a row | SoftwareCentral has not yet found a software update group for the plan. Deploy is also hidden while the plan is disabled. | Wait for the plan to create its group, then check again. Enable the plan if it is disabled. |
| The Preview list is empty | No upgrade matches the filters you chose. | Click the Language, Required or Title link and change or clear the filter. |