1 Open the interface
Open the AD menu and choose Azure AD Groups. The page heading reads Entra ID Groups, the name the product uses for the same interface.
The interface shows Microsoft Entra ID groups through Microsoft Graph. It needs the Graph permissions listed in Intune Permissions, in particular Group.ReadWrite.All and GroupMember.ReadWrite.All for changes.
2 The group list
The main window lists every group you are allowed to see, with the columns below.
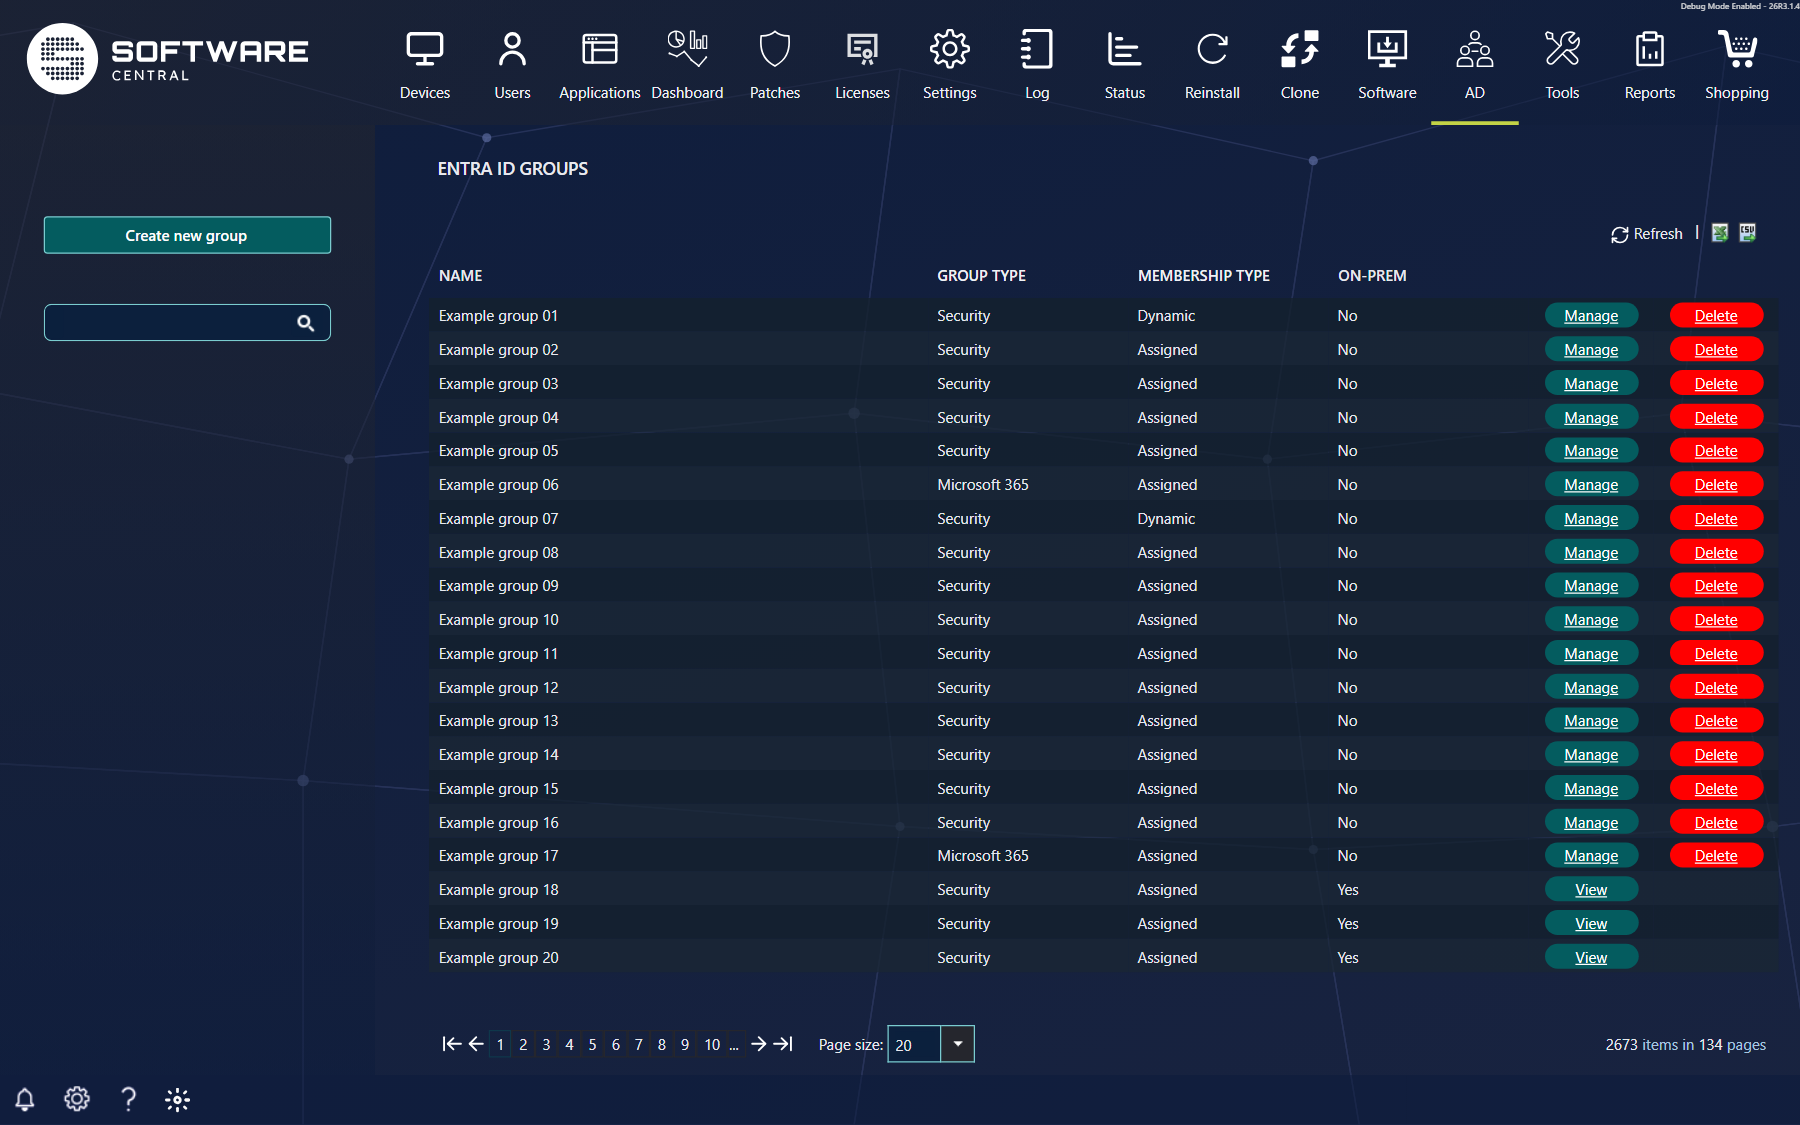
| Column | What it tells you |
|---|---|
| Name | The display name of the group. Click it to open the group. |
| Group type | Security or Microsoft 365. |
| Membership type | Assigned (members are added by hand) or Dynamic (members are chosen by a membership rule). |
| On-prem | Yes when the group is synchronised from your own Active Directory, otherwise No. |
| Manage / View | Manage opens the group for changes. A group that is synchronised from on-premises Active Directory shows View instead, and you cannot change it here. |
| Delete | Deletes the group. The button is not shown for groups that are synchronised from on-premises Active Directory. |
Use the search box on the left to find a group by name. Create new group is in the left menu above it.
3 What you can do
Your role decides which buttons you see. Each right is separate.
| Right | What it allows |
|---|---|
| View groups | Opens the list. Groups are shown only if your role is allowed to see them. |
| Manage groups | Opens a group and shows the Manage buttons in the list. |
| Create groups | Shows Create new group in the left menu. |
| Delete groups | Shows the Delete buttons in the list. |
4 Open and edit a group
Click a group name. A new window opens with four tabs: Properties, Members, Member of and Applications.
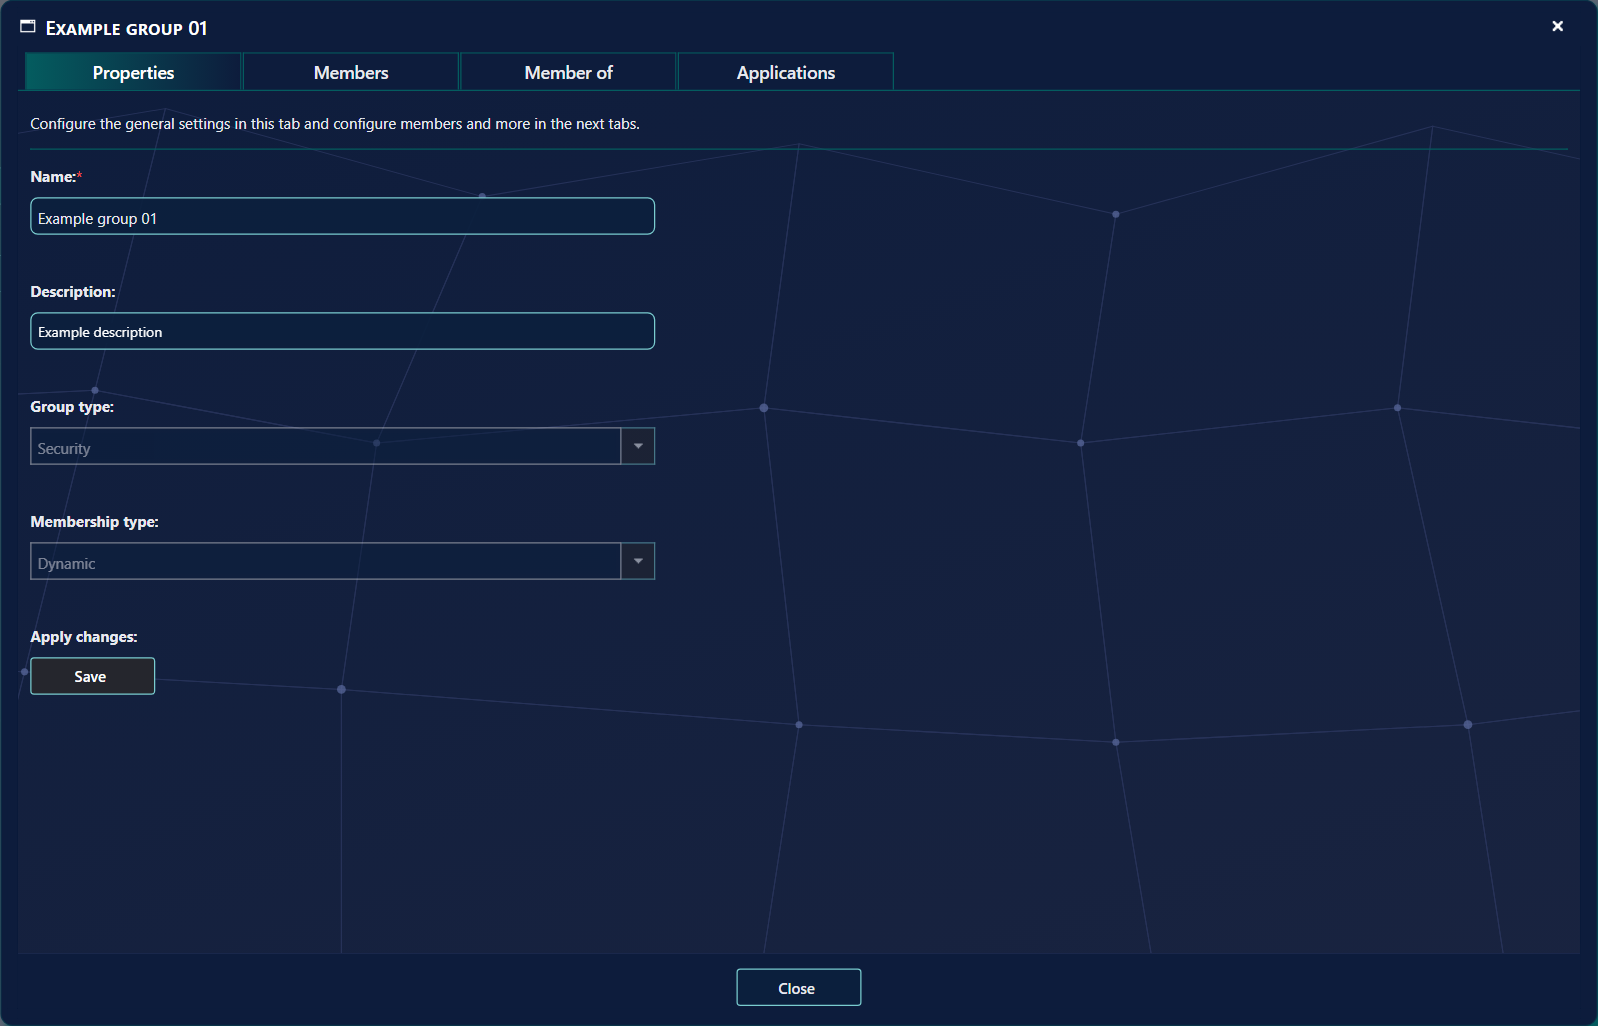
The Name is required. The name must be unique in the directory: if another group has the same name, Save stops with an error.
Groups that are synchronised from on-premises Active Directory open as read-only. The window says Cannot edit on-prem groups. and the fields are disabled.
Click the name of another group in the Members or Member of tab to open it. You can open only the groups you are allowed to manage.
5 Members
The Members tab has two lists. The left list shows the current members. The right list, Add members, searches users, devices and groups that you can add.
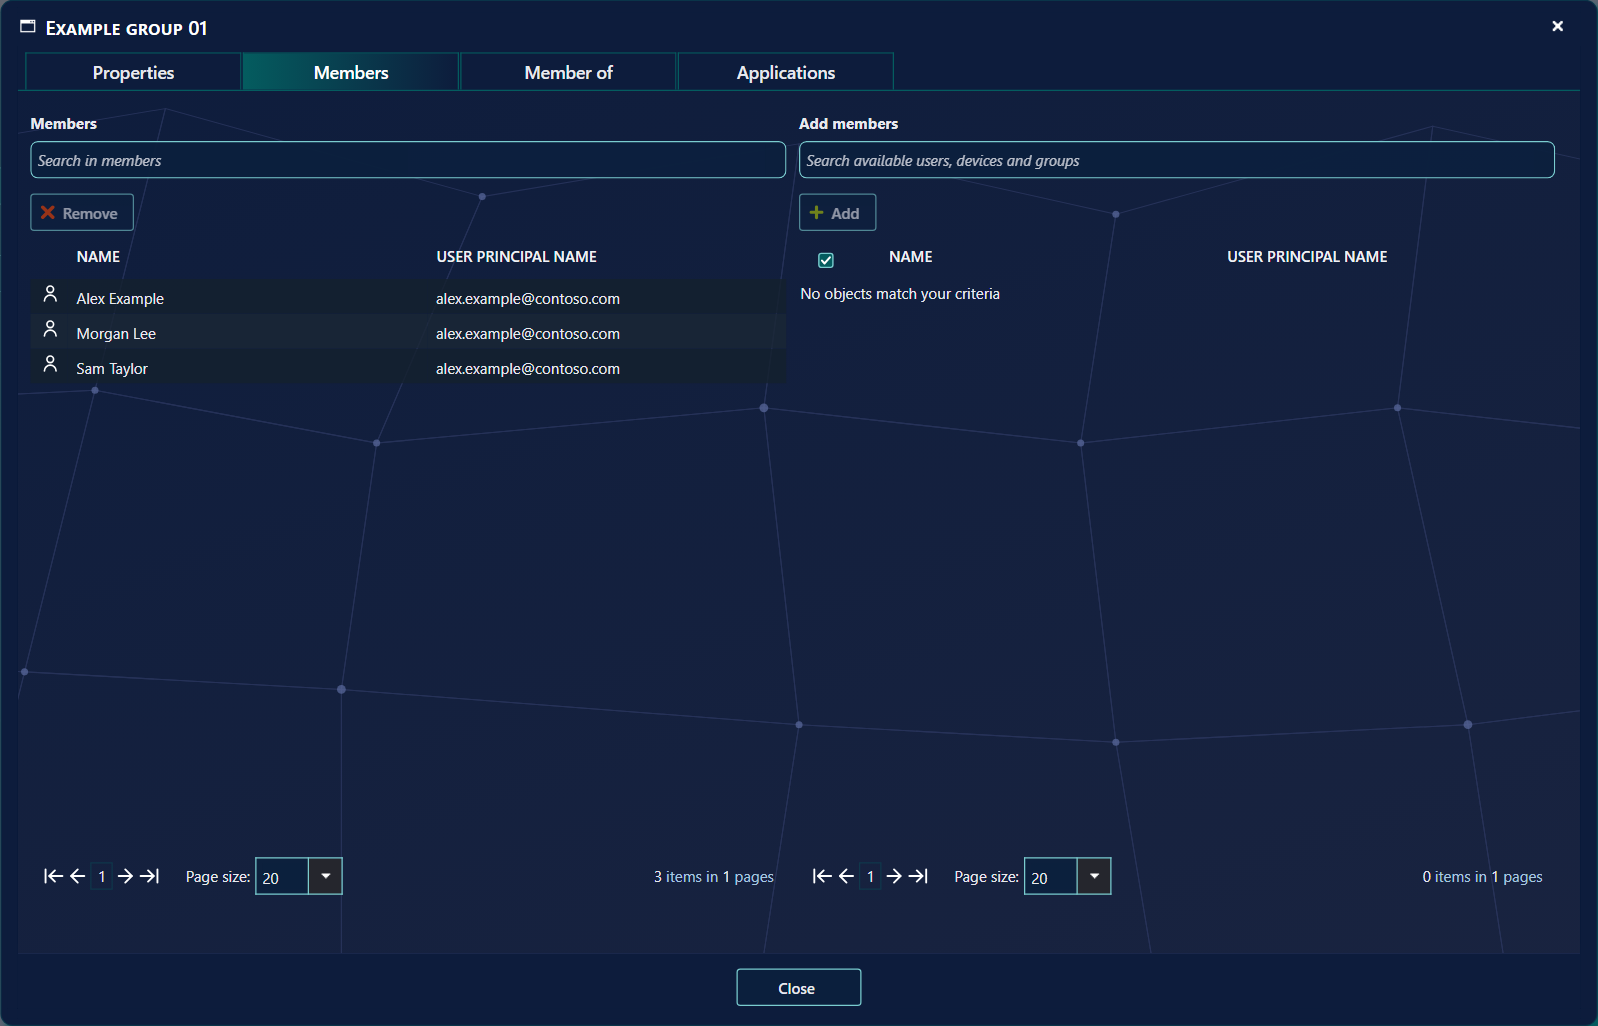
To add members, search in Search available users, devices and groups, tick the items you want, and click Add. The button shows how many items are selected. To take members out, tick them in the left list and click Remove. Both actions write to Entra ID.
A Microsoft 365 group takes only users as members, so the Add members list shows only users for that group type.
6 Member of
The Member of tab shows the groups this group belongs to, and lets you add it to other groups.
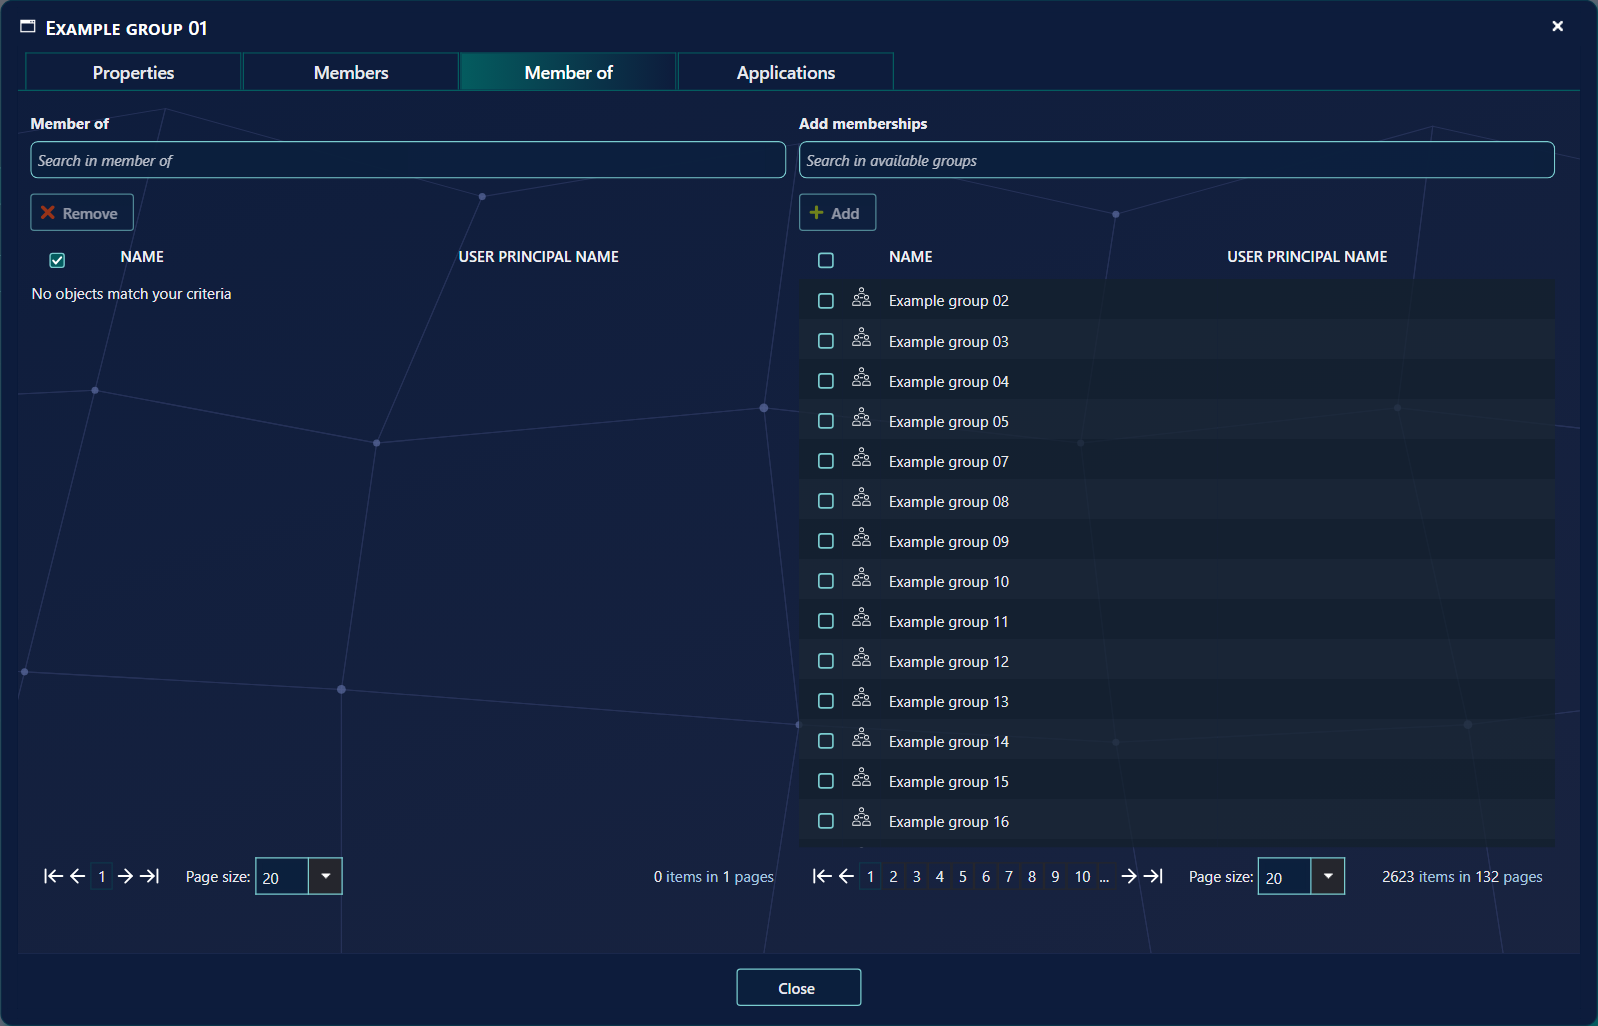
Tick the groups on the right under Add memberships and click Add. To leave a group, tick it on the left and click Remove. Both actions write to Entra ID.
7 Create a group
From the left menu, use the Create new group button to create a new group.
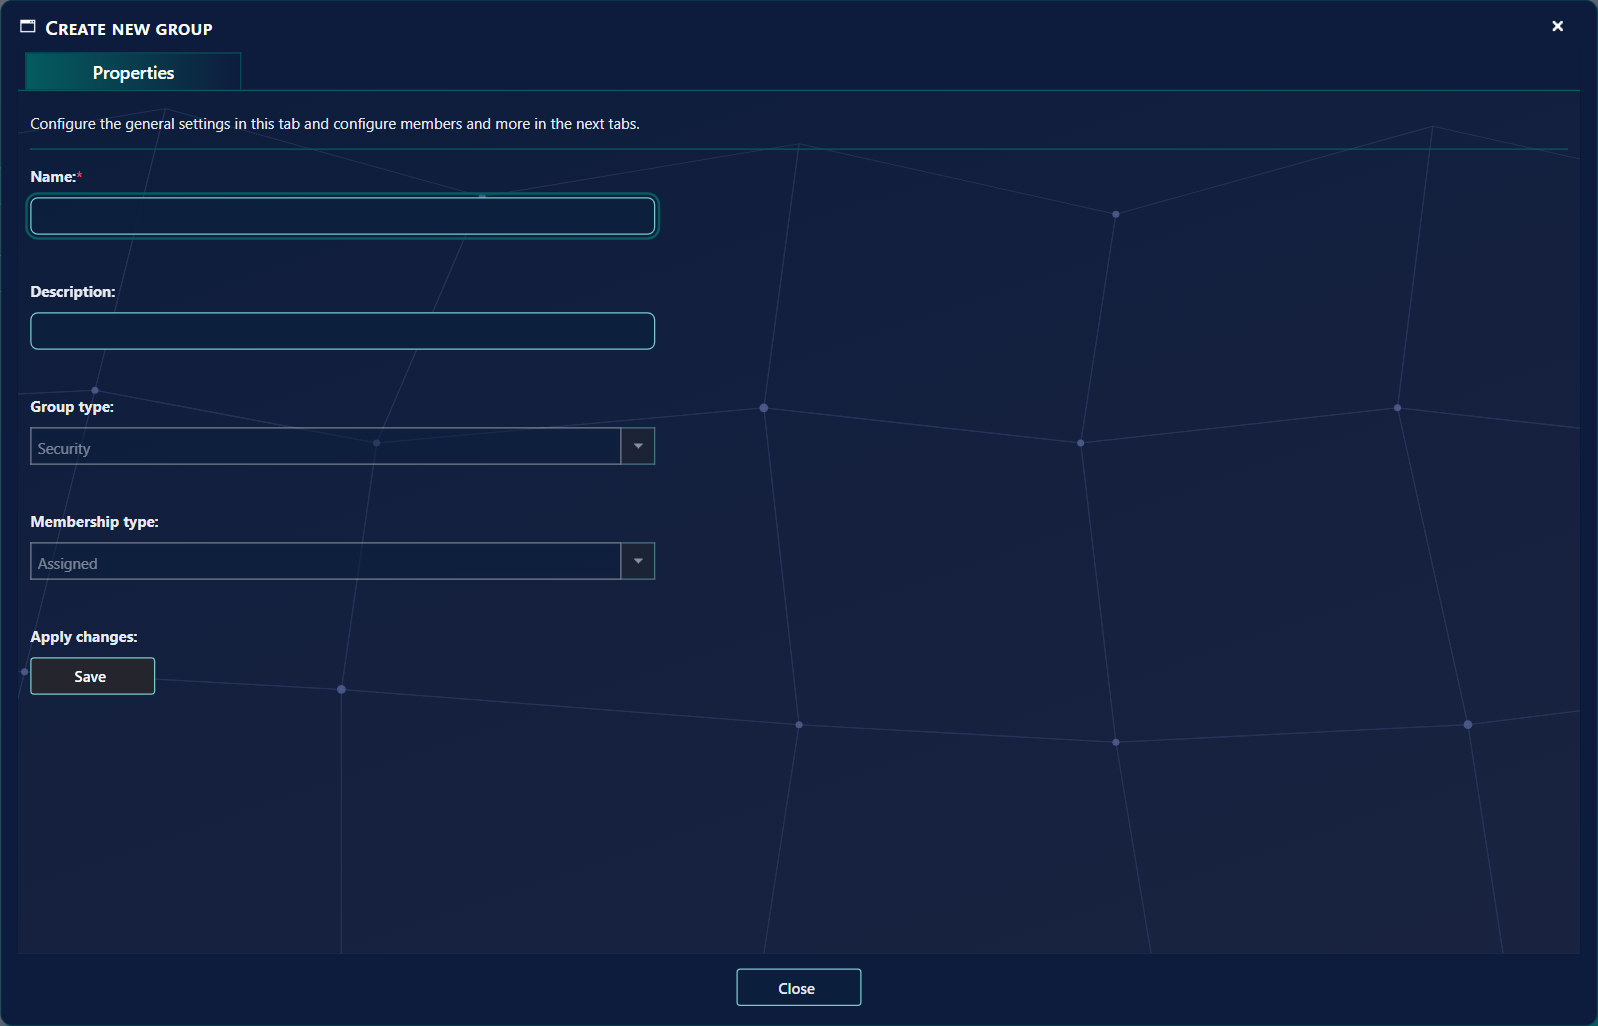
You can only create security groups with assigned members through SoftwareCentral. The new group is always a Security group with Assigned membership, even when you open the Group type or Membership type list, because only the name and description are saved when a group is created.
When the group has been created, you can add members to it.
8 Delete a group
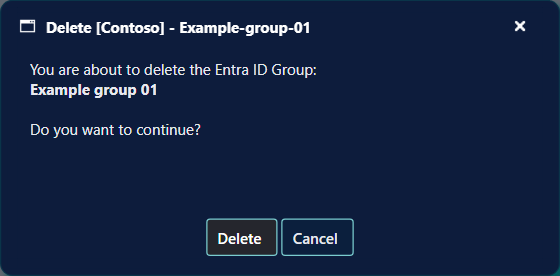
Using the Delete button on the row of a group, you can delete it.
9 Best practice
- Give each right only where it is needed. Create groups and Delete groups are separate rights. A role that only needs to edit members should not be able to delete groups.
- Set up the Graph permissions first. Without
Group.ReadWrite.AllandGroupMember.ReadWrite.Allthe list loads but changes fail. See Intune Permissions. - Manage on-premises groups in Active Directory. A group marked Yes under On-prem is synchronised from your own Active Directory and is read-only here.
- Use dynamic groups for rule-based membership. Their members follow the rule, and the page does not let you add or remove members of a dynamic group by hand.
- Check before you delete. Deleting a group cannot be undone from SoftwareCentral, and the group disappears for everyone who uses the directory.
10 Troubleshooting
| Symptom | Cause | What to do |
|---|---|---|
| "A name is required." | The Name box is empty. | Type a name and click Save again. |
| "A group with the same name already exists." | Another group in the directory has this name. | Choose a different name. |
| "Display name can be no longer than 120 characters." | The name is longer than 120 characters. | Shorten the name. |
| "Cannot edit on-prem groups." | The group is synchronised from on-premises Active Directory. | Change the group in Active Directory. The window stays read-only. |
| "Access denied." page in the group window | The group is not in the list your role may manage, or your role lacks the Manage groups right. | Open the group from the list, and ask an administrator to check the rights of your role. |
| "Access denied." in the delete window | Your role lacks the Delete groups right, or the group is not in the list your role may see. | Ask an administrator to check the rights of your role. |
| The list is empty or does not load | Microsoft Graph cannot be reached or the permissions are missing. | Check the Graph permissions in Intune Permissions and the log under Log for the error. |