SoftwareCentral · Applications

Create Package

The earlier seven-step way to import a package into SCCM. It is not in the Applications menu of the current version; use the Package Wizard instead.

Package information Folder and files Flags

1 Overview

Create Package is not in the Applications menu of the current version. Import packages with the Package Wizard, which has three steps and the same kind of settings.
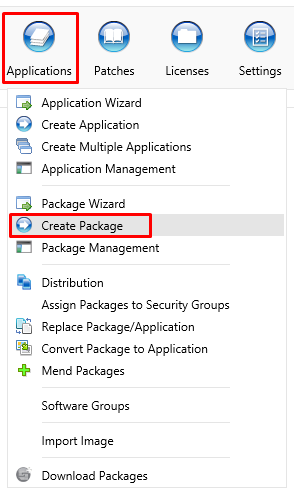
Earlier version The pictures and steps below describe the earlier Create Package wizard. They are kept for reference and are not what the current menu shows.
Earlier version: the Applications menu with Create Package highlighted in red, between Package Wizard and Package Management.
Earlier version: Applications › Create Package, outlined in red. In the current menu this item is not listed.

Create Package can be used to import packages into SCCM. It is an older version of the Package Wizard.

It is divided into 7 steps. In the left menu you can see the progress of the wizard.

2 Earlier steps

Step 1 – Package Information

In step 1 you must enter the manufacturer, package name, version and select the language.
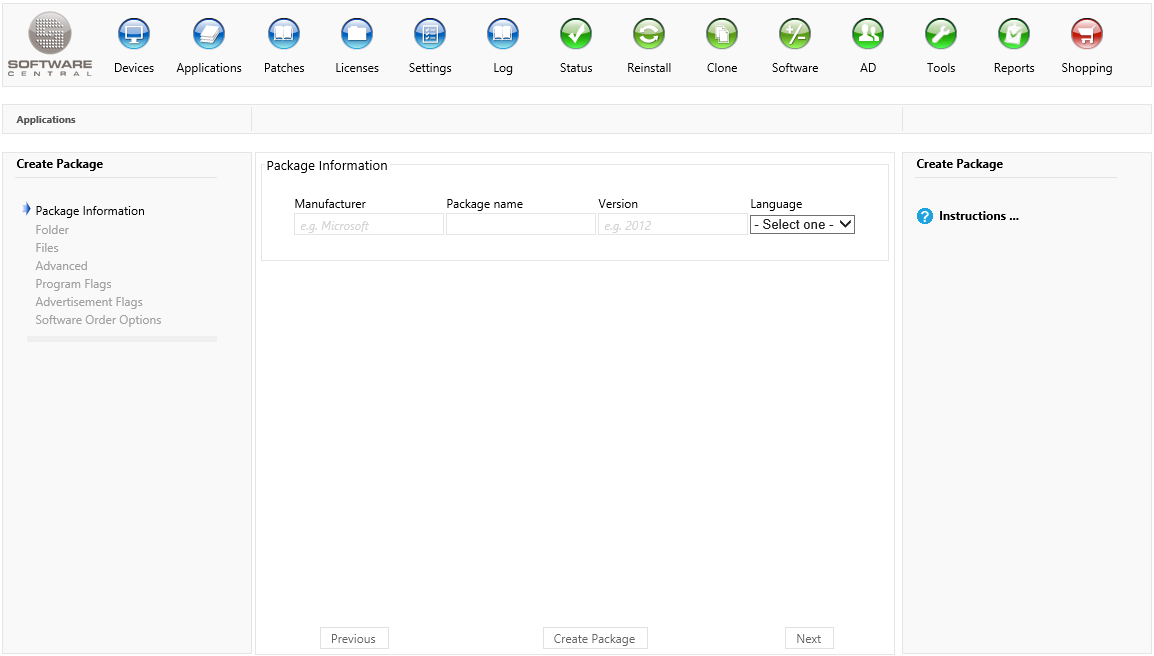
Earlier version: step 1, Package Information, with the boxes Manufacturer, Package name, Version and a Language drop-down, and Previous, Create Package and Next at the bottom.
Earlier version of step 1, Package Information: Manufacturer, Package name, Version and Language.

Click on the “Next” button to continue.

Step 2 – Folder

In the second step, you must select a root folder. Click on the “Open Folder Explorer” button, browse to the desired root folder and double-click to select it.

If you need to upload a file to the folder, click on the “Select” button to select the file. If you have multiple files, compress the files in a zip file and upload the zip file.

Uploaded files will be placed in a folder named after the package. ([Manufacturer] [Package name] [Version] [Language]).
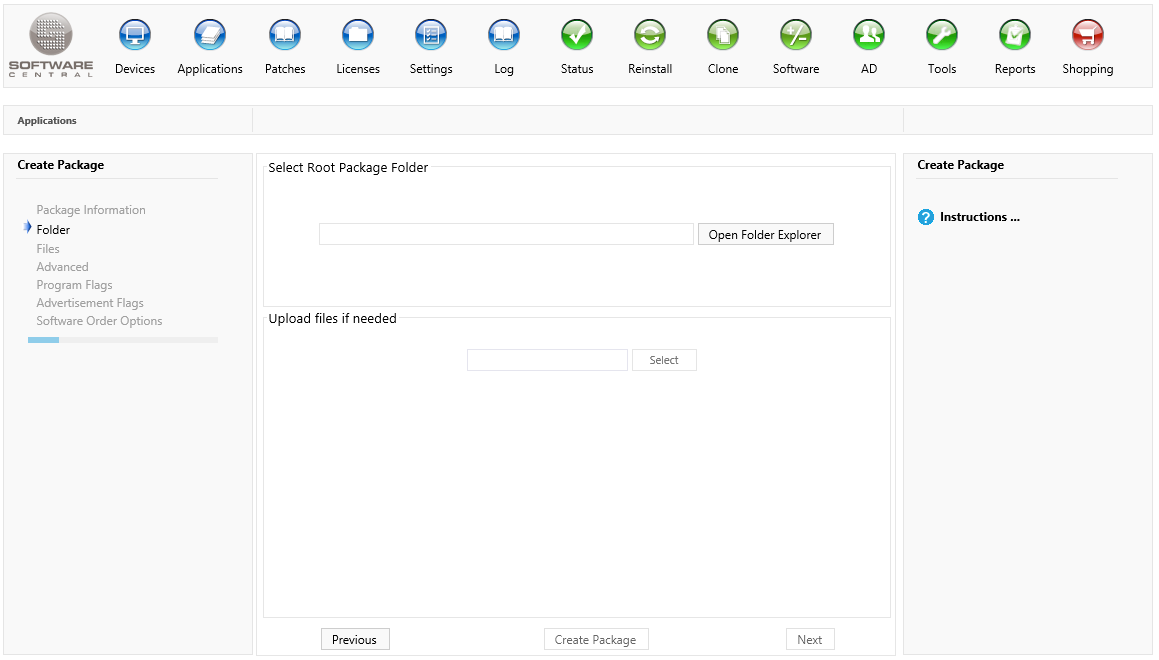
Earlier version: step 2, Folder, with the Select Root Package Folder box and its Open Folder Explorer button, and the Upload files if needed box with its Select button.
Earlier version of step 2, Folder: Open Folder Explorer selects the root folder, and Select uploads a file.

Click on the “Next” button to continue to the third step.

Step 3 – Files

In step 3, SoftwareCentral will try to auto-detect the installation files. If you disagree with SoftwareCentral, click on the red “x” next to the file.

Click on the “Open File Explorer” to browse to the files manually. Double-click on the desired files to select them.
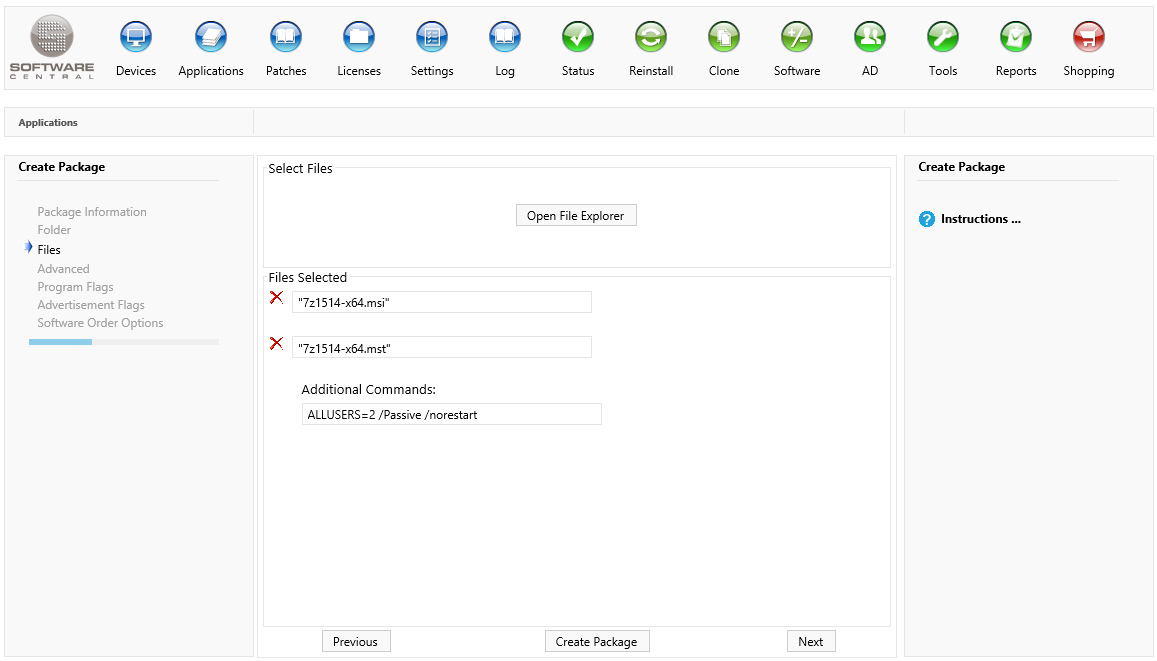
Earlier version: step 3, Files, with the Open File Explorer button, the selected MSI and MST files with red X buttons beside them, and an Additional Commands box.
Earlier version of step 3, Files: the files that were detected, each with a red X to remove it, and the Additional Commands box.
Note The package is now ready to be created with the default settings. Click on the “Create Package” button to create the package.

Click on the “Next” button to continue to the fourth step, to set the advanced settings.

Step 4 – Advanced

In step 4 you can choose distribution points, distribution point groups, package security groups and an SCCM package folder.
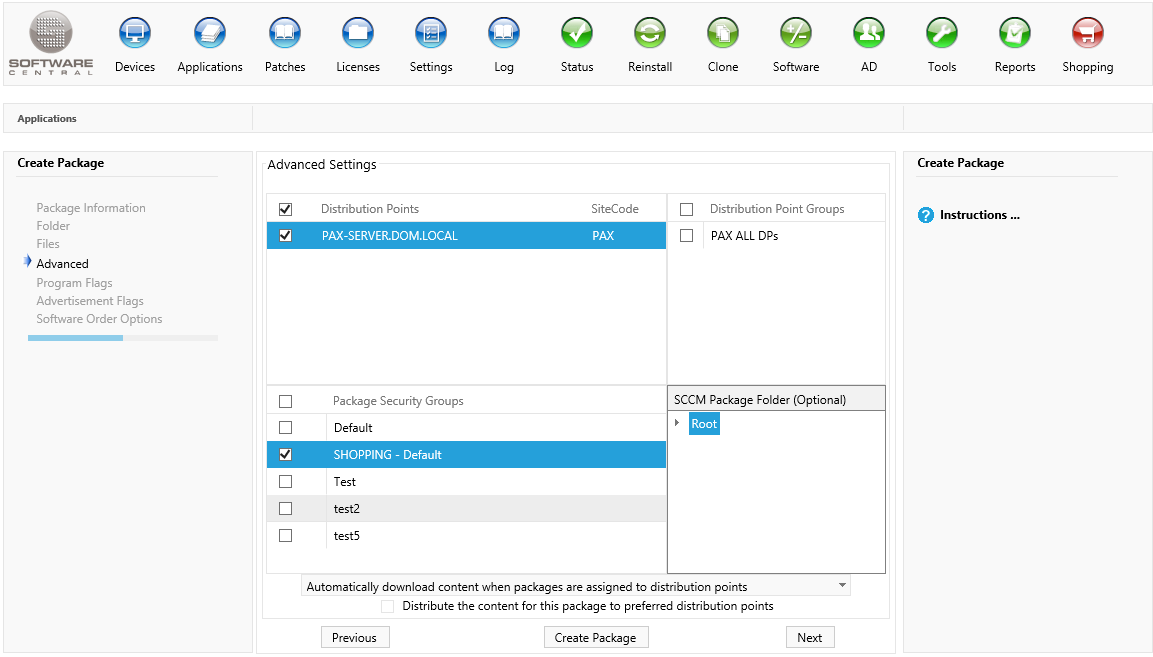
Earlier version: step 4, Advanced Settings, with a list of distribution points with a site code column, distribution point groups, Package Security Groups with check boxes, a download drop-down and the SCCM Package Folder tree.
Earlier version of step 4, Advanced. The names in the picture are masked.

Click on the “Next” button to continue to the fifth step.

Step 5 – Program Flags

In step 5 you can set the program flags for the install and uninstall program.
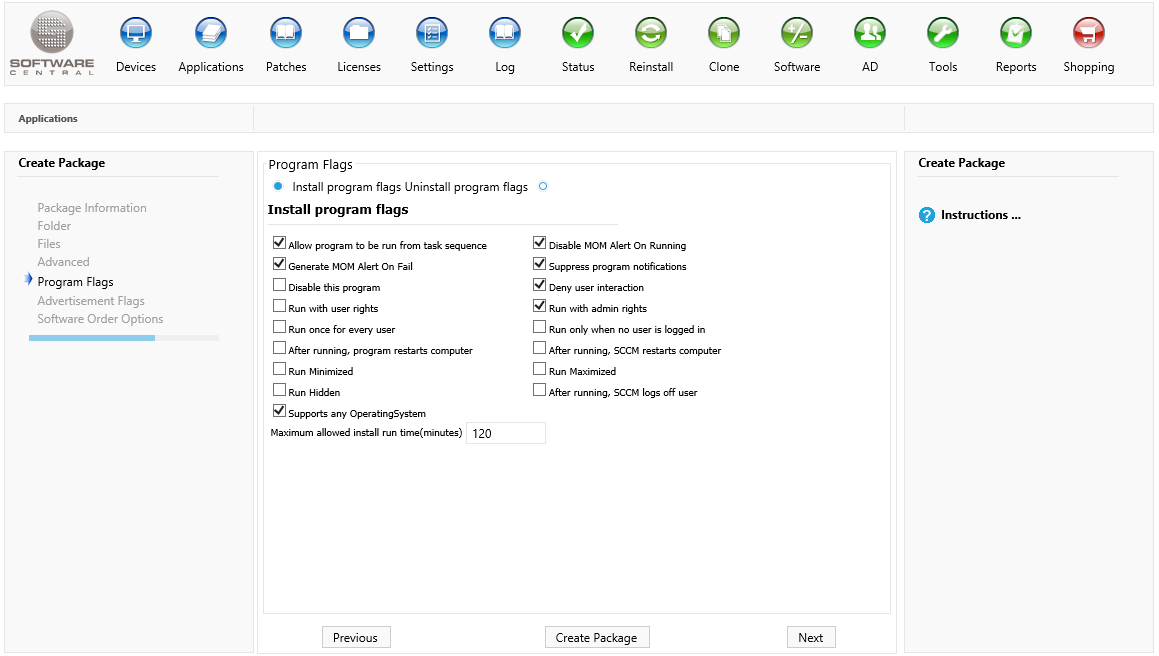
Earlier version: step 5, Program Flags, with the Install and Uninstall program flags choice, a list of check boxes such as Supports any OperatingSystem, and the Maximum allowed install run time box set to 120.
Earlier version of step 5, Program Flags.

Click on the “Next” button to continue to the sixth step.

Step 6 – Advertisement Flags

In step 6 you can set the advertisement flags for the install and uninstall program.
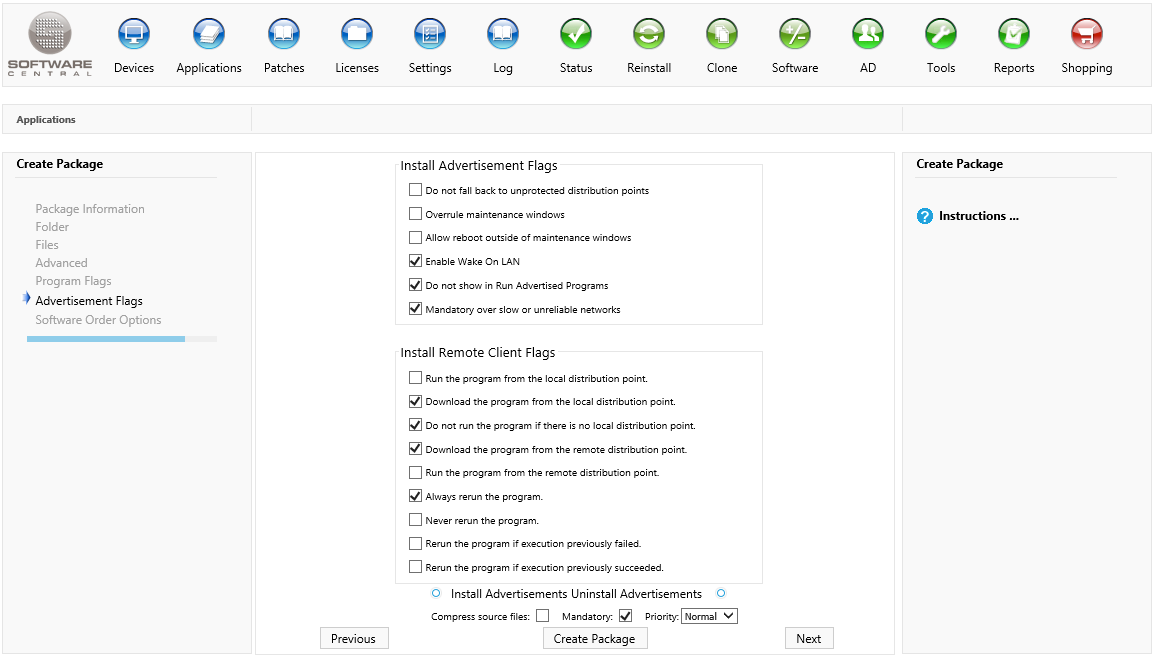
Earlier version: step 6, Advertisement Flags, with the install advertisement flags and install remote client flags check boxes, the Install and Uninstall Advertisements choice, and the Compress source files, Mandatory and Priority settings.
Earlier version of step 6, Advertisement Flags, with Compress source files, Mandatory and Priority at the bottom.

Click on the “Next” button to continue to the final step.

Step 7 – Software Order Options

In the final step you can set the basic software order options. Use the Software Administration interface for more options.
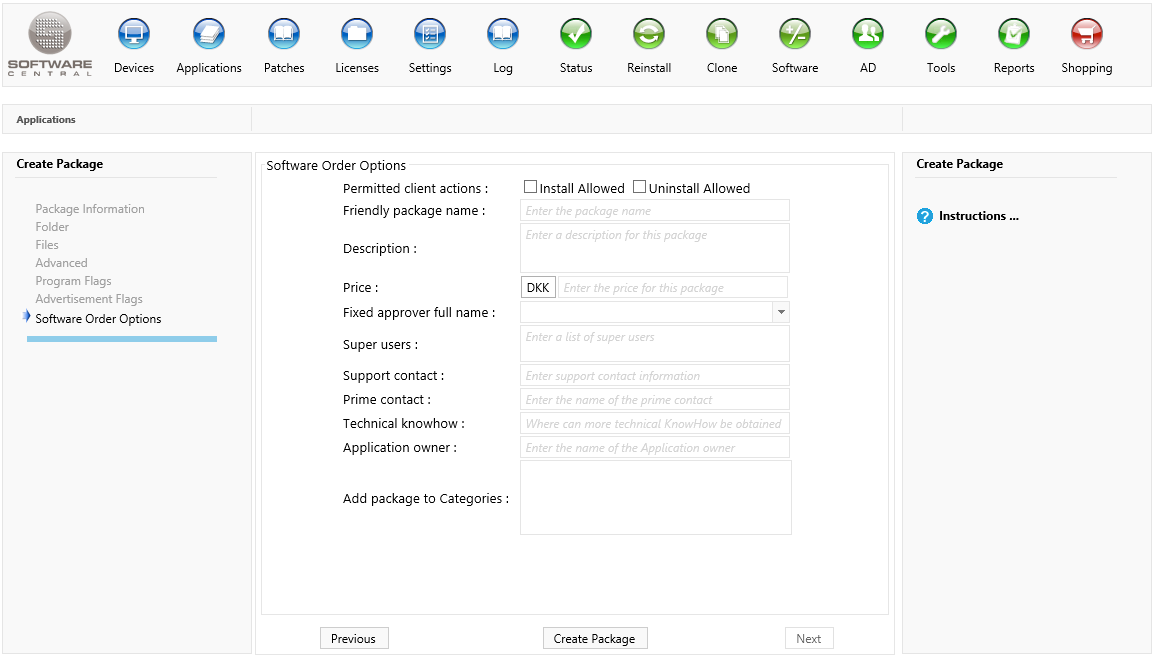
Earlier version: step 7, Software Order Options, with the Permitted client actions check boxes, Friendly package name, Description, Price, Fixed approver full name, Super users, contact boxes and Add package to Categories.
Earlier version of step 7, Software Order Options.

Click on the “Create Package” button to create the package.

3 Best practice

  • Use the Package Wizard for new imports. It asks for the same information in three steps.
  • Keep the distribution points, Package Security Groups and SCCM folder in a Package Template, so that each import needs no changes on the steps.
  • Check the Log after an import to confirm that the package was created.