1 Create the plan
Open the Deployment Manager and click Create Deployment Plan.
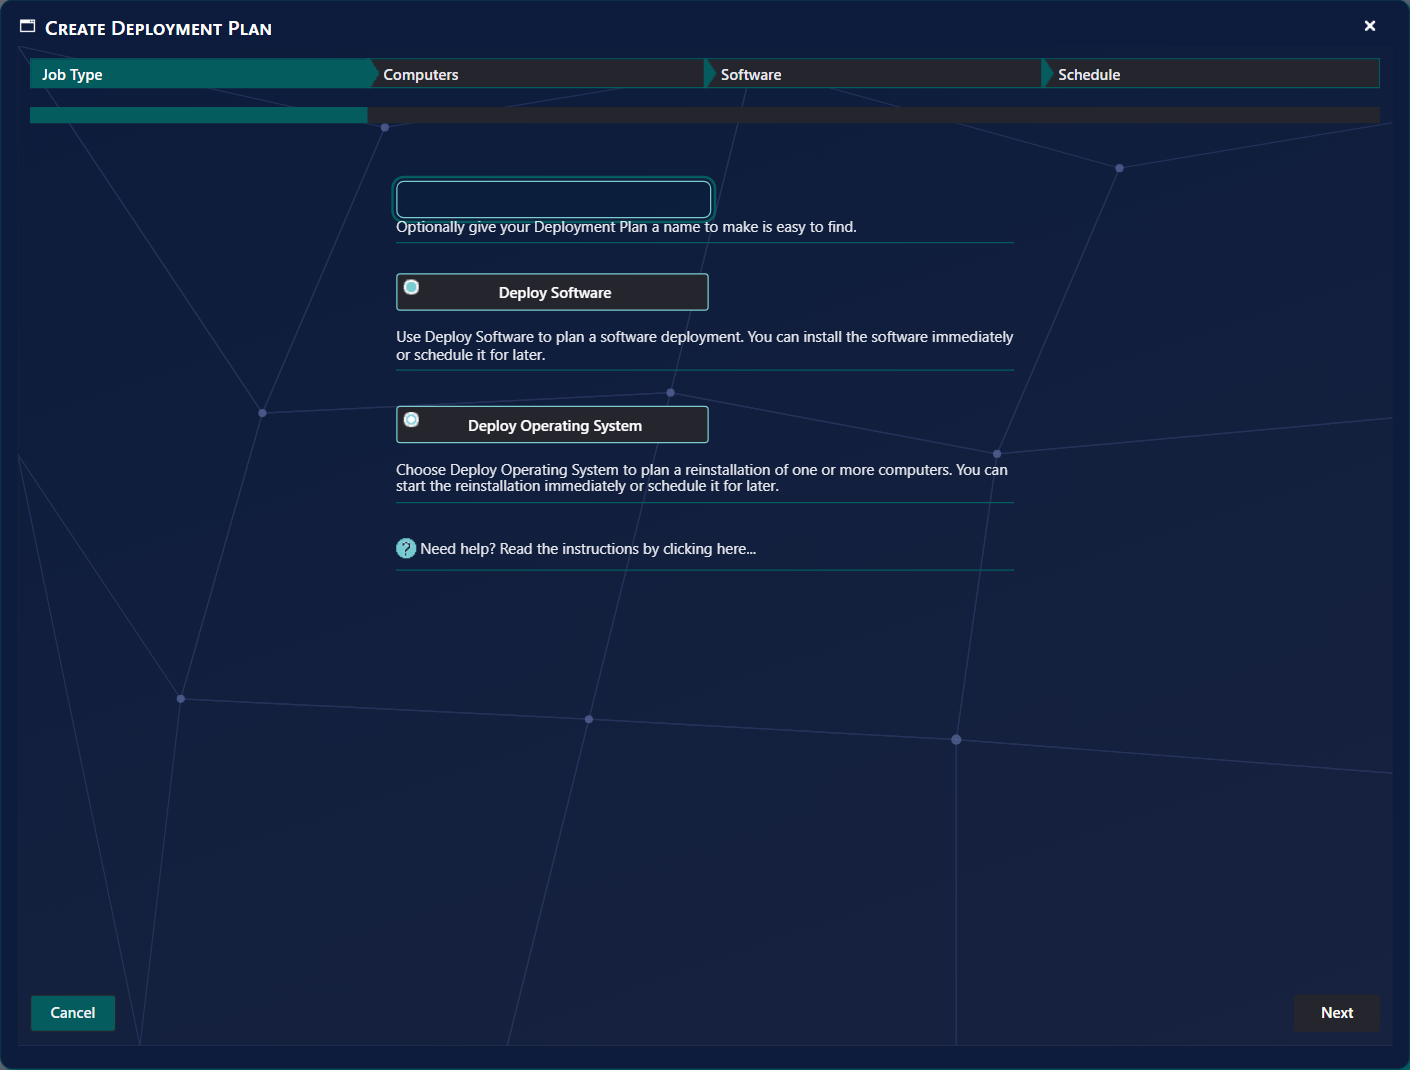
A new window opens with the wizard. The steps are shown at the top: Job Type, Computers, Software and Schedule. Click a step to go to it, or use the Next and Previous buttons in the lower right corner. Cancel in the lower left corner closes the wizard without creating a plan.
2 Job Type
Choose what the plan does. You can also give the plan a name.
| Option | What it does |
|---|---|
| Deploy Software | Installs or removes one or more programs on the selected computers. |
| Deploy Operating System | Reinstalls the selected computers (reinstall a computer), with an optional computer template and software groups. |
| Create Phased Deployment | Creates a phased deployment. This option is shown only for some roles and SCCM versions, so it is not on every screen. See Phased Deployment. |
You can give your job a name to make it easier to find later in the Deployment Manager. The name box above the options is optional. The steps described in the rest of this page are for software deployments and operating system deployments.
3 Computers
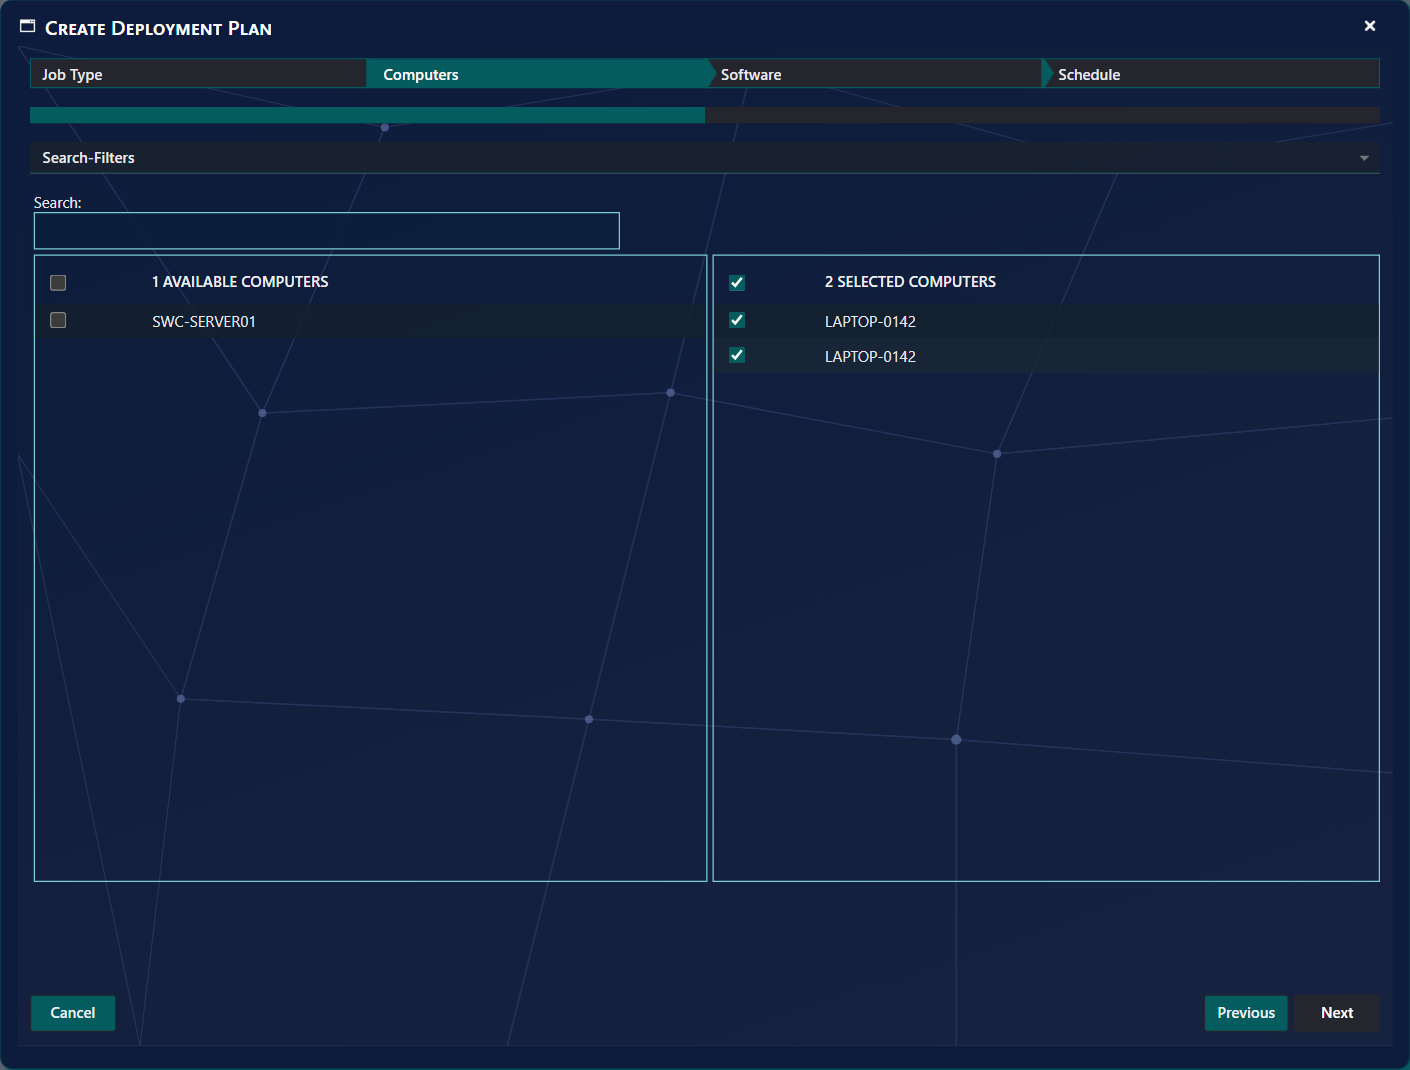
Select the computers you want to deploy to. The list on the left shows the available computers; the list on the right shows the selected ones.
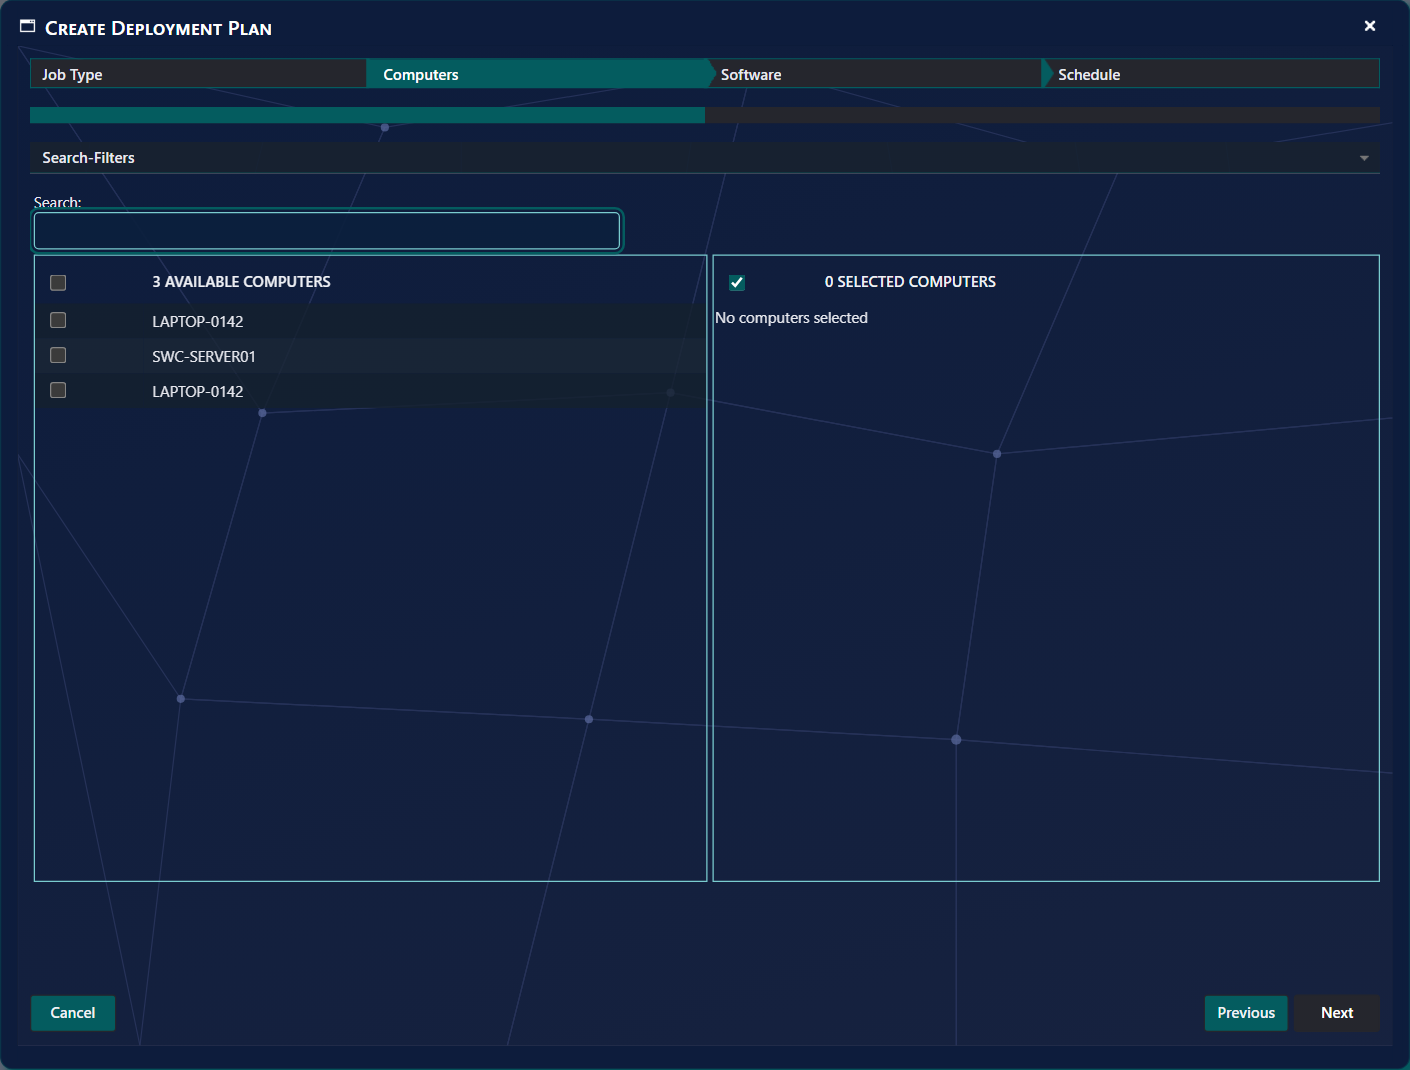
- Click the check box next to each computer to select it. Selected computers appear in the list on the right.
- The Select All check box in the header selects the computers in the list. If your role has a maximum number of resources, only that number is selected, and the message You are only allowed to select N computers appears.
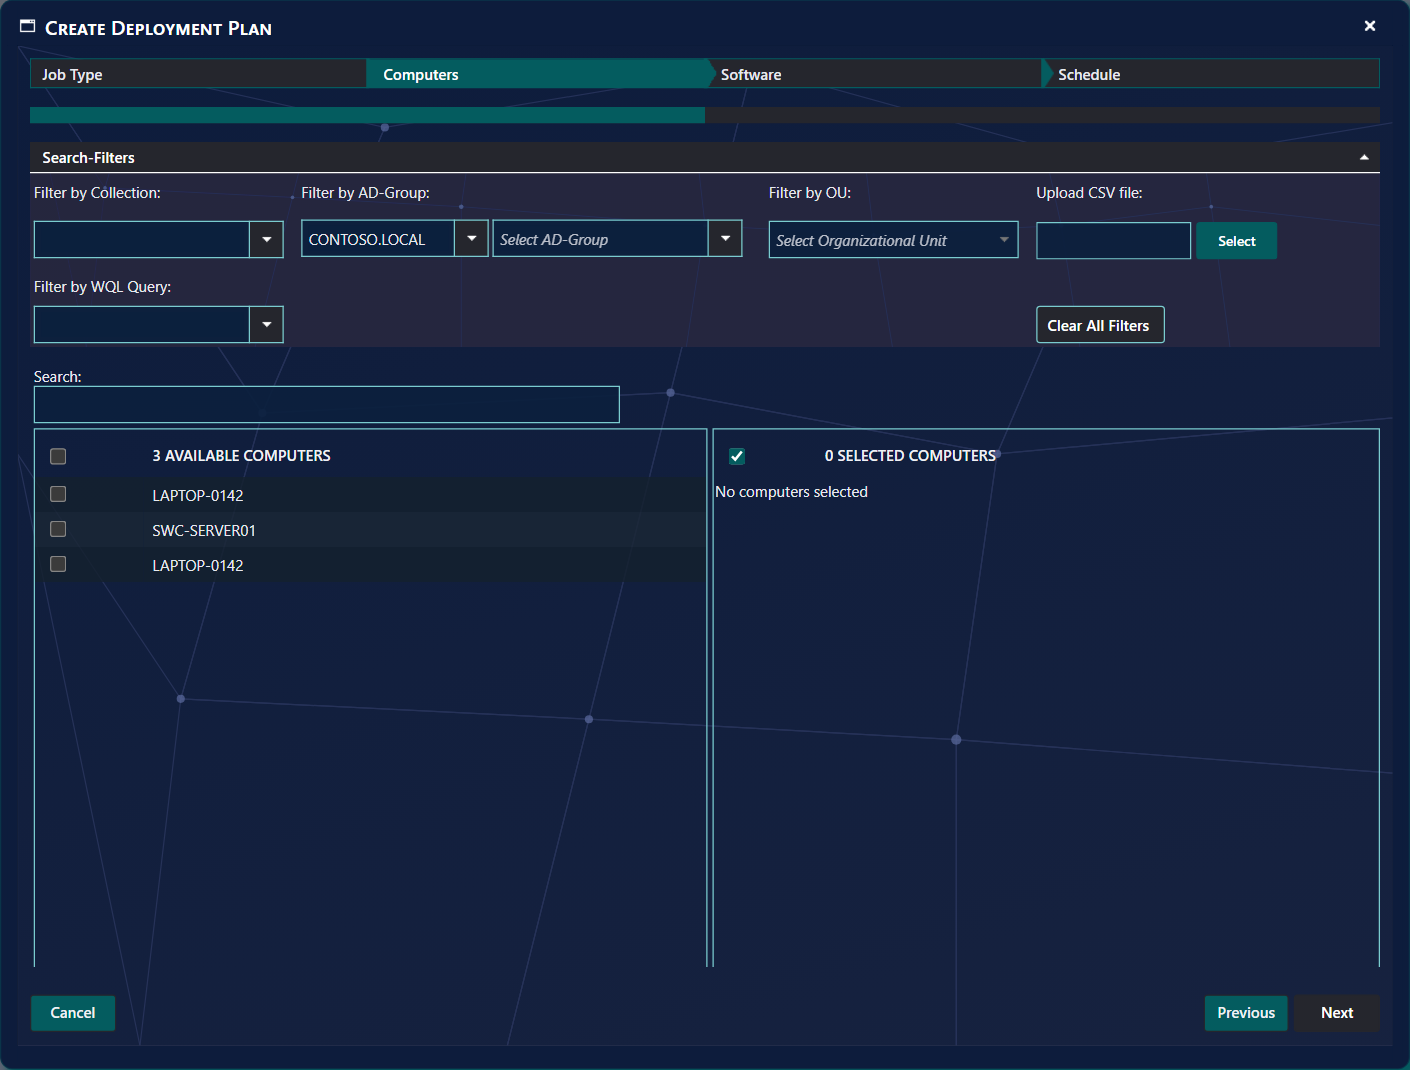
Search-Filters: click the Search-Filters bar to open the filters.
| Filter | What it does |
|---|---|
| Filter by Collection | Shows all computers in a given collection. |
| Filter by AD-Group | Shows all computers in a given AD group. |
| Filter by OU | Shows all computers in a given organisational unit. |
| Upload CSV file | Uploads a CSV file with a list of computer names or resource IDs. |
| Filter by WQL Query | Shows all computers returned by a WQL query or computer group. |
| Clear All Filters | Resets all filters and shows all available computers. |
When you have selected your computers, the list on the right shows them:
4 Software
The Software step depends on the job type you chose. Deploy Software lists the packages; Deploy Operating System lists the templates, operating systems and software groups.
Deploy Software
Use the Search box at the top to find a program by its name.
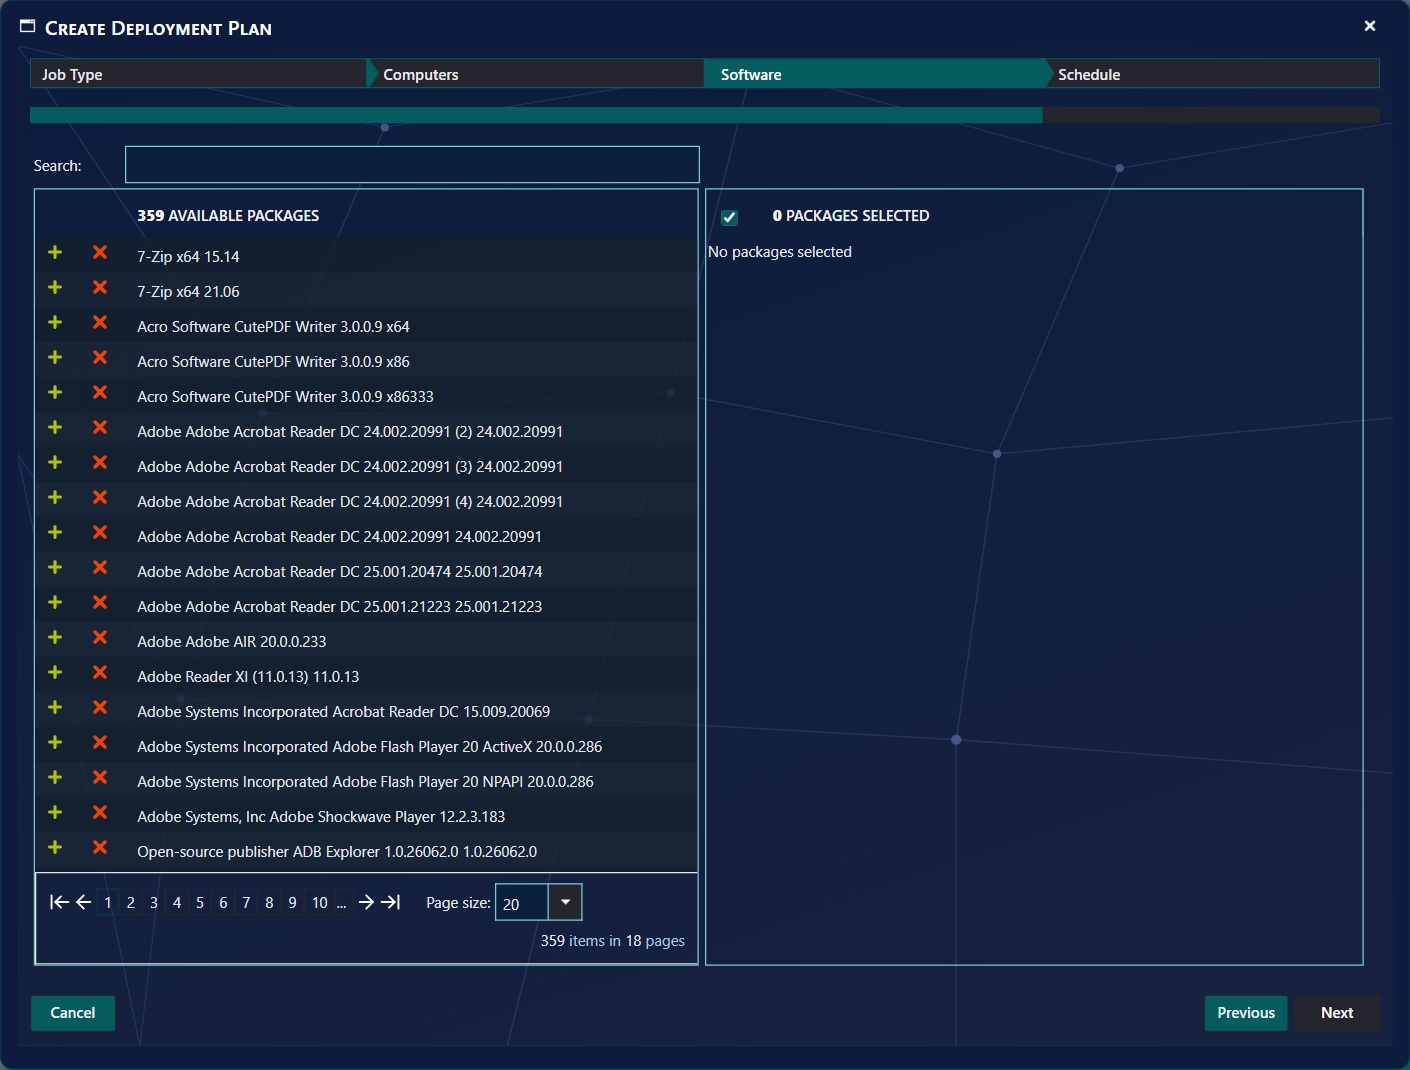
- The green + button installs the program on the target computers where it is not already installed.
- The red × button removes the program from the target computers where it is installed.

Deploy Operating System
If you chose Deploy Operating System, the Software step shows the operating system options.
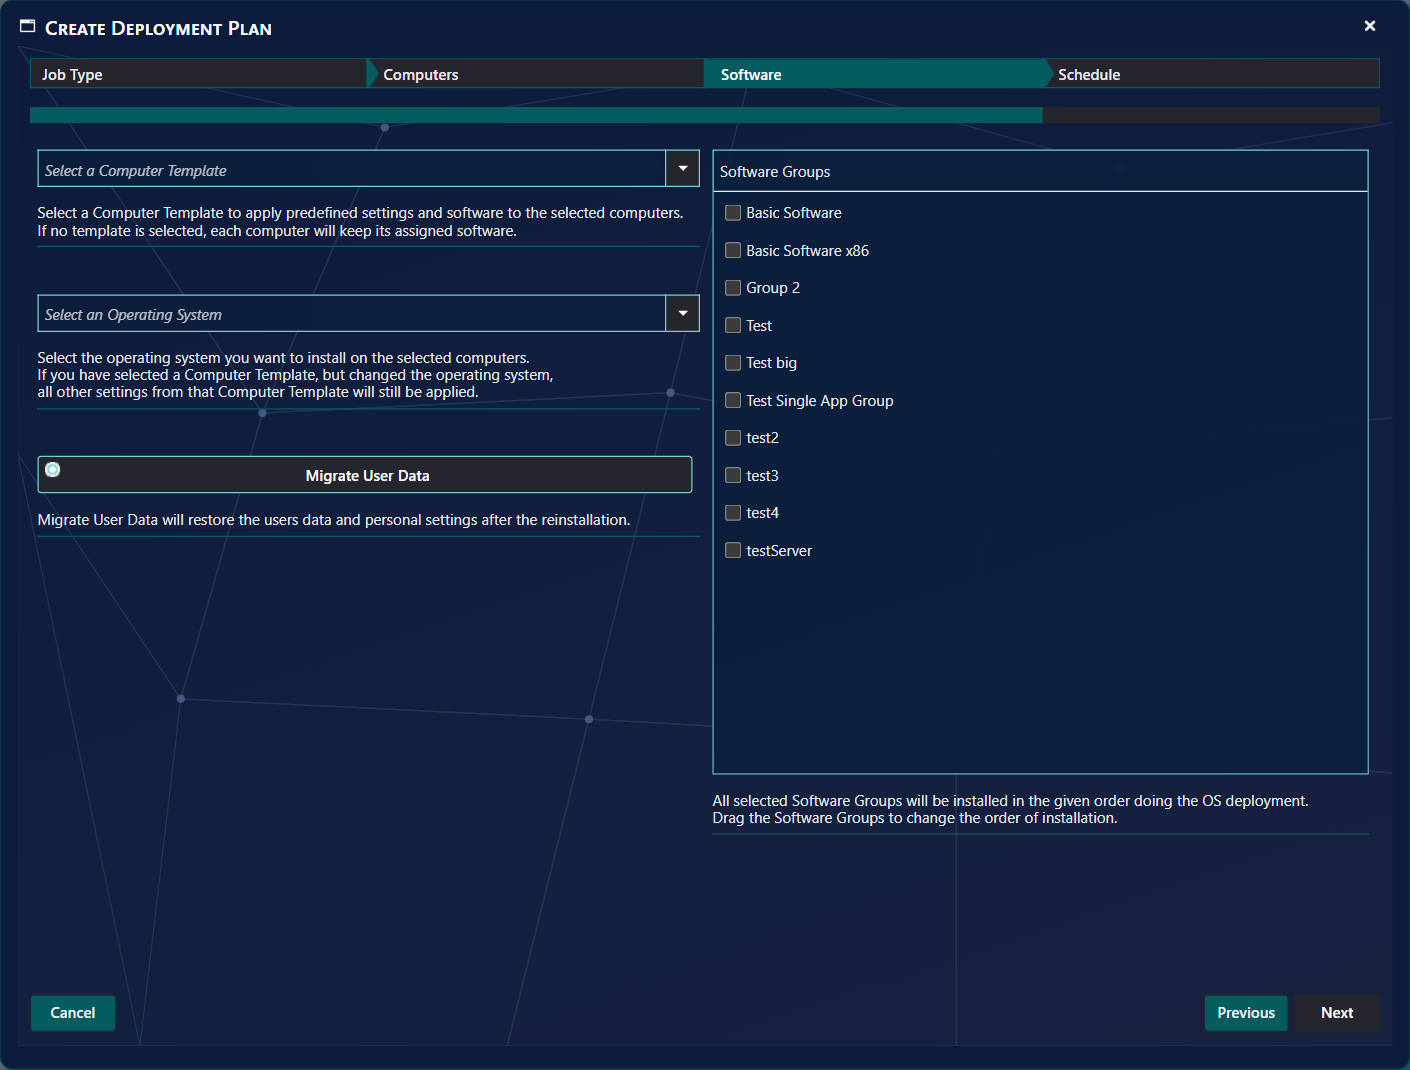
- Select a Computer Template applies the predefined settings and software of a template to the selected computers. If no template is selected, each computer keeps its assigned software.
- Select an Operating System chooses the operating system to install. If you select a template and then change the operating system, all other settings from that template are still applied.
- Migrate User Data, if selected, restores the user's personal settings and data after the reinstallation.
- Tick the Software Groups you want to apply to the computers that are being reinstalled. They are installed in the order shown. Drag a software group to change the order.

5 Schedule
The last step decides whether the plan starts now or later. The wizard's last button is Finish.
By default Run Immediately is selected. Click Finish in the lower right corner to start the deployment.
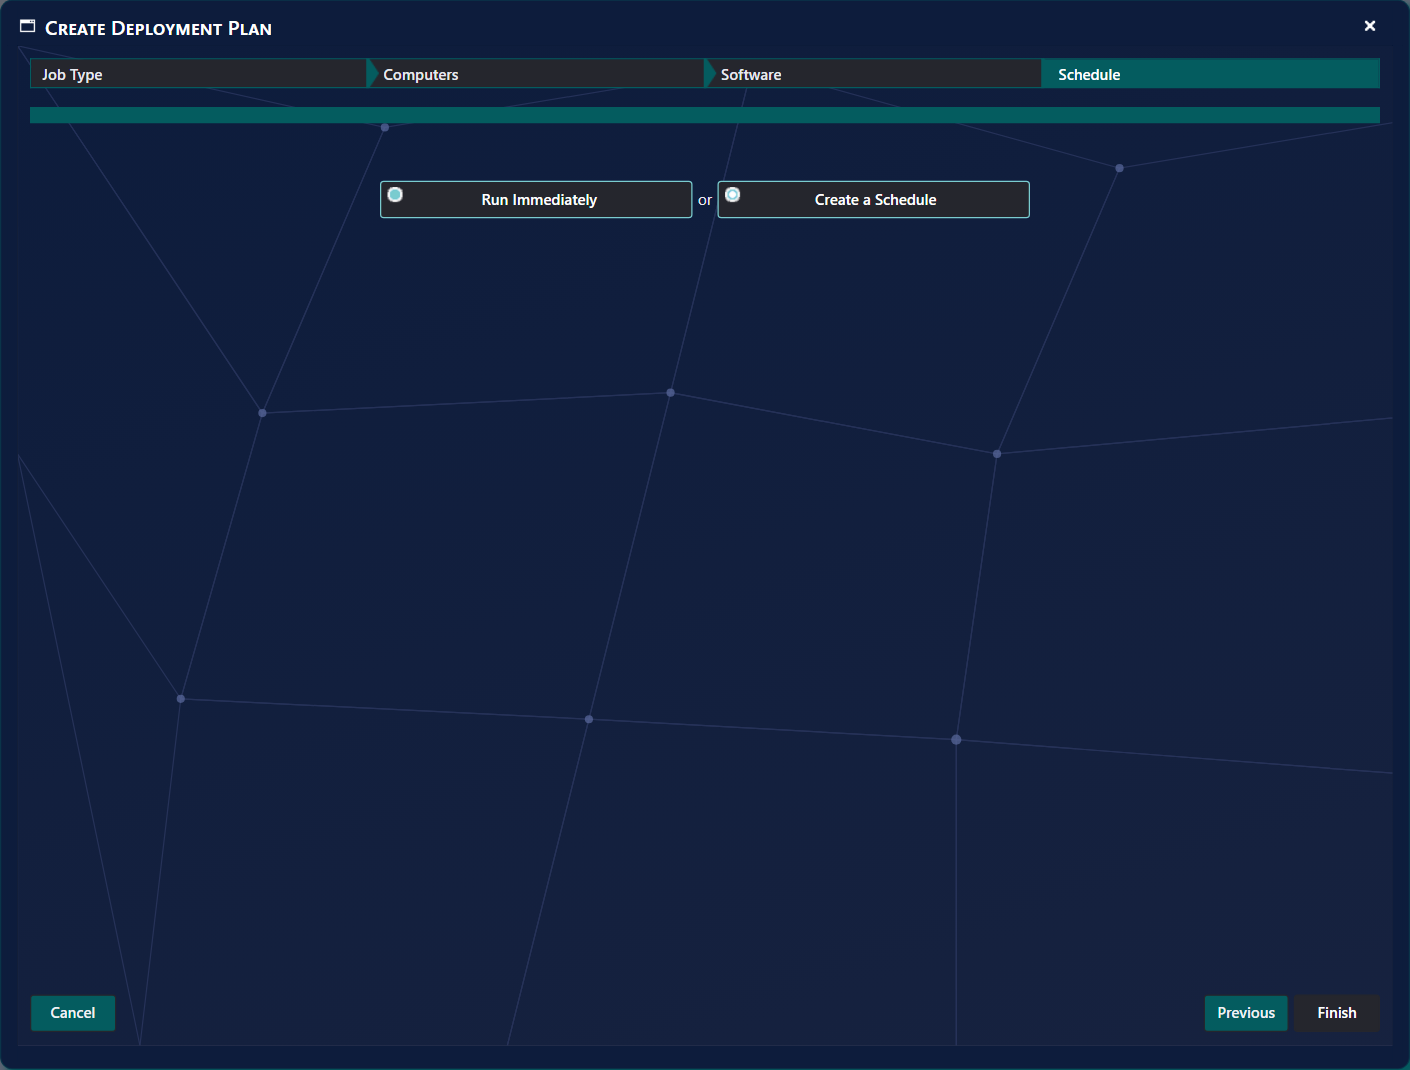
To run the deployment later, choose Create a Schedule:
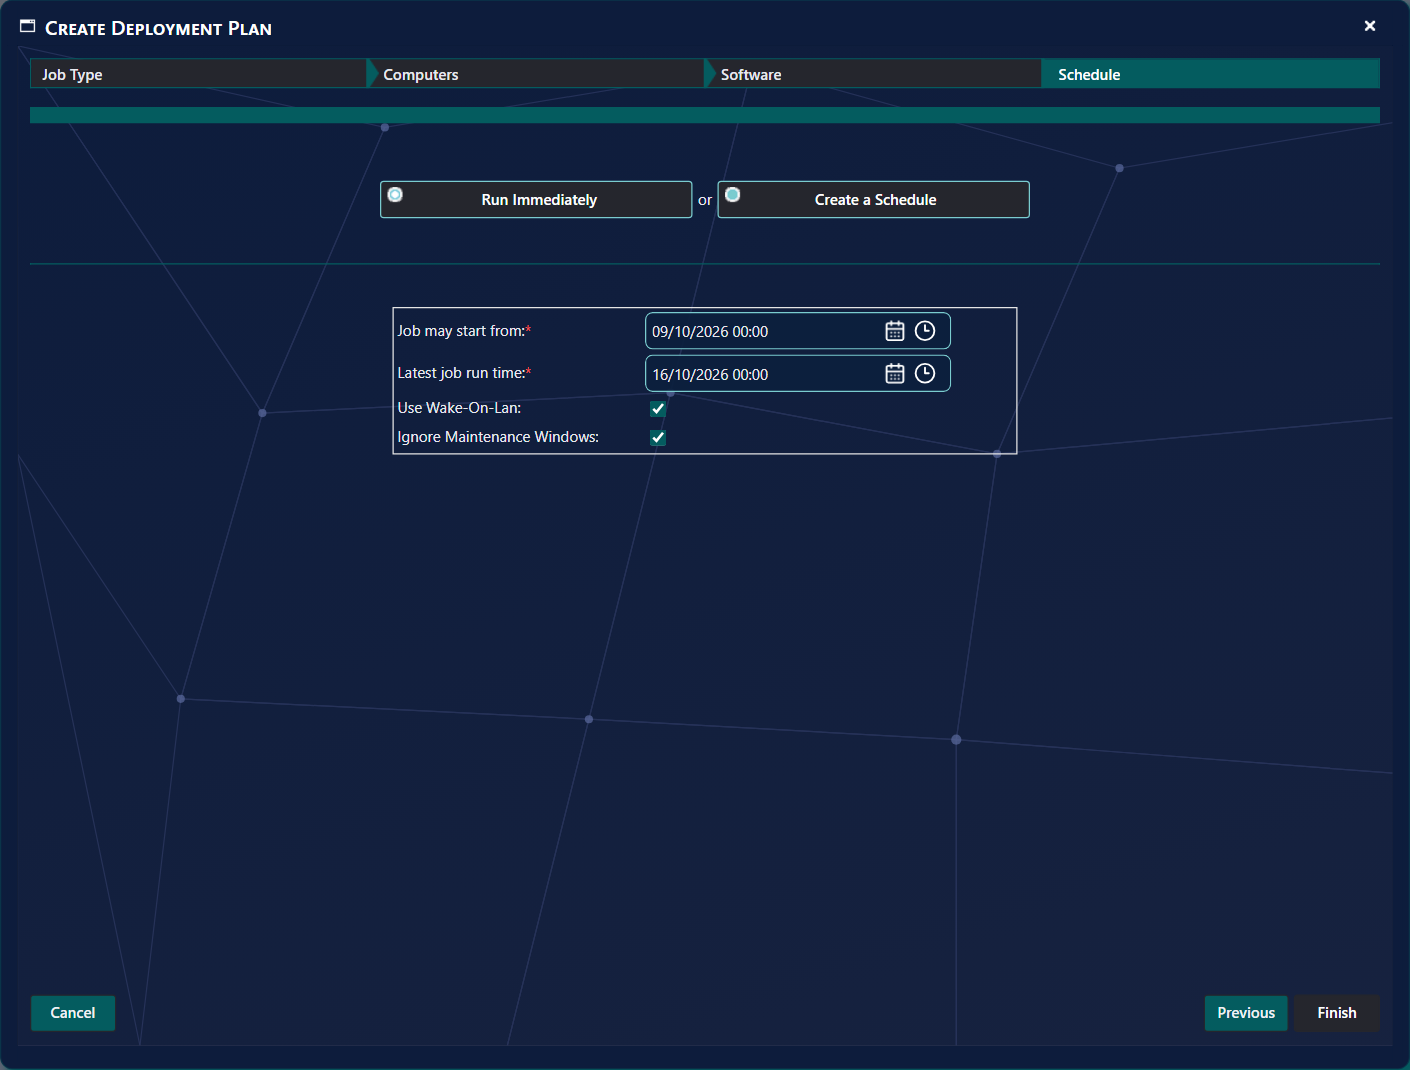
- Job may start from and Latest job run time are required. The deployment can start at any time after the first and must start before the second.
- Use Wake-On-Lan, when ticked, turns on the computer when the deployment starts.
- Ignore Maintenance Windows, when ticked, ignores any maintenance windows and forces the installation through. It is ticked by default; clear it to respect the maintenance windows.
Press Finish to save the schedule.
6 After you finish
Once your deployment is saved, it appears in the list of deployments on the Deployment Manager page.
To see the status of your deployment, click View on its row. The Deployment Monitor opens and shows live data from your deployment. See Deployment Monitor for how to read the status and how to fix failed deployments.
7 Best practice
- Check the number of selected computers before you press Finish. If your role has a maximum number of resources, the selection is cut to that number and a message says so.
- Clear Ignore Maintenance Windows for production computers. It is ticked by default, so the installation can run inside a maintenance window.
- Set both dates for a schedule. A schedule needs a start and a latest run time, and a latest run time in the past means the job will never run.
- Keep operating system reinstalls to 100 computers or fewer at a time. The wizard refuses more than 100 selected computers.
- Order the software groups deliberately. They are installed in the order shown in the Software Groups list.
8 Troubleshooting
| Symptom | Cause | What to do |
|---|---|---|
| No computers selected | You pressed Finish with no computer ticked. The wizard goes back to Computers. | Tick at least one computer. |
| No packages selected | You pressed Finish for a software deployment with no package chosen. The wizard goes back to Software. | Add at least one package with the green + button. |
| No Operating System selected | You pressed Finish for Deploy Operating System with no operating system chosen. The wizard goes back to Software. | Choose an operating system in Select an Operating System. |
| You can not reinstall more than 100 computers at a time | More than 100 computers are selected for an operating system deployment. The wizard goes back to Computers. | Select 100 computers or fewer, and create another plan for the rest. |
| You are only allowed to select '5' computers (the number depends on your role) | Your role has a maximum number of resources. When you press Finish, only that number of the selected computers is kept. | Check the list under Computers before you press Finish, or ask an administrator to change the role's maximum. |
| A valid start time is required | The Job may start from box is empty or not a valid date and time. | Enter a valid start date and time. |
| The end time must be after the start time | The Latest job run time is earlier than or equal to the start time. | Set a later latest run time. |
| The end time is in the past. This job will never run. | The Latest job run time has already passed. | Set a latest run time in the future. |
| Failed to save deployment job. | The plan could not be saved. The cause is written to the log. | Check the Log page for the failure, then try again. |