1 Overview
SoftwareCentral can deploy multiple packages or applications in a predefined order by using Software Groups.
Software Groups can be used during operating system deployments or deployed separately to existing computers.
You can also use Application Groups which you can read more about here.
When using Software Groups during an operating system deployment, SoftwareCentral will write a base variable (Name: ”LAB_SoftwareGroupAppXXX”, Value: ”PackageID:ProgramName”) for each package (and Name: ”LAB_ApplicationBaseVariableXX”, Value: ”ApplicationName” for applications in SCCM 2012). The task sequence must have a step to deploy software where it reads these base variables.
When deploying a Software Group to an existing machine (using Manage Software), SoftwareCentral writes the same variables and deploy an automatically generated task sequence that reads these variables, and install the packages.
After the installation, a vbscript is executed on the machine that will add the computer to the separate install collections for each package, enabling helpdesk personnel to uninstall the packages.
Finally the computer is removed from the task sequence deploy collection.
The Reinstall Computer interface and the Deployment Manager allows users to install the same Software Groups, or remove them.
2 Interface
The Software Group page (under Settings) displays all software groups currently created and the site they belong to.
Software Groups behave like packages, they will be available to a site’s children, but not to any parent sites.
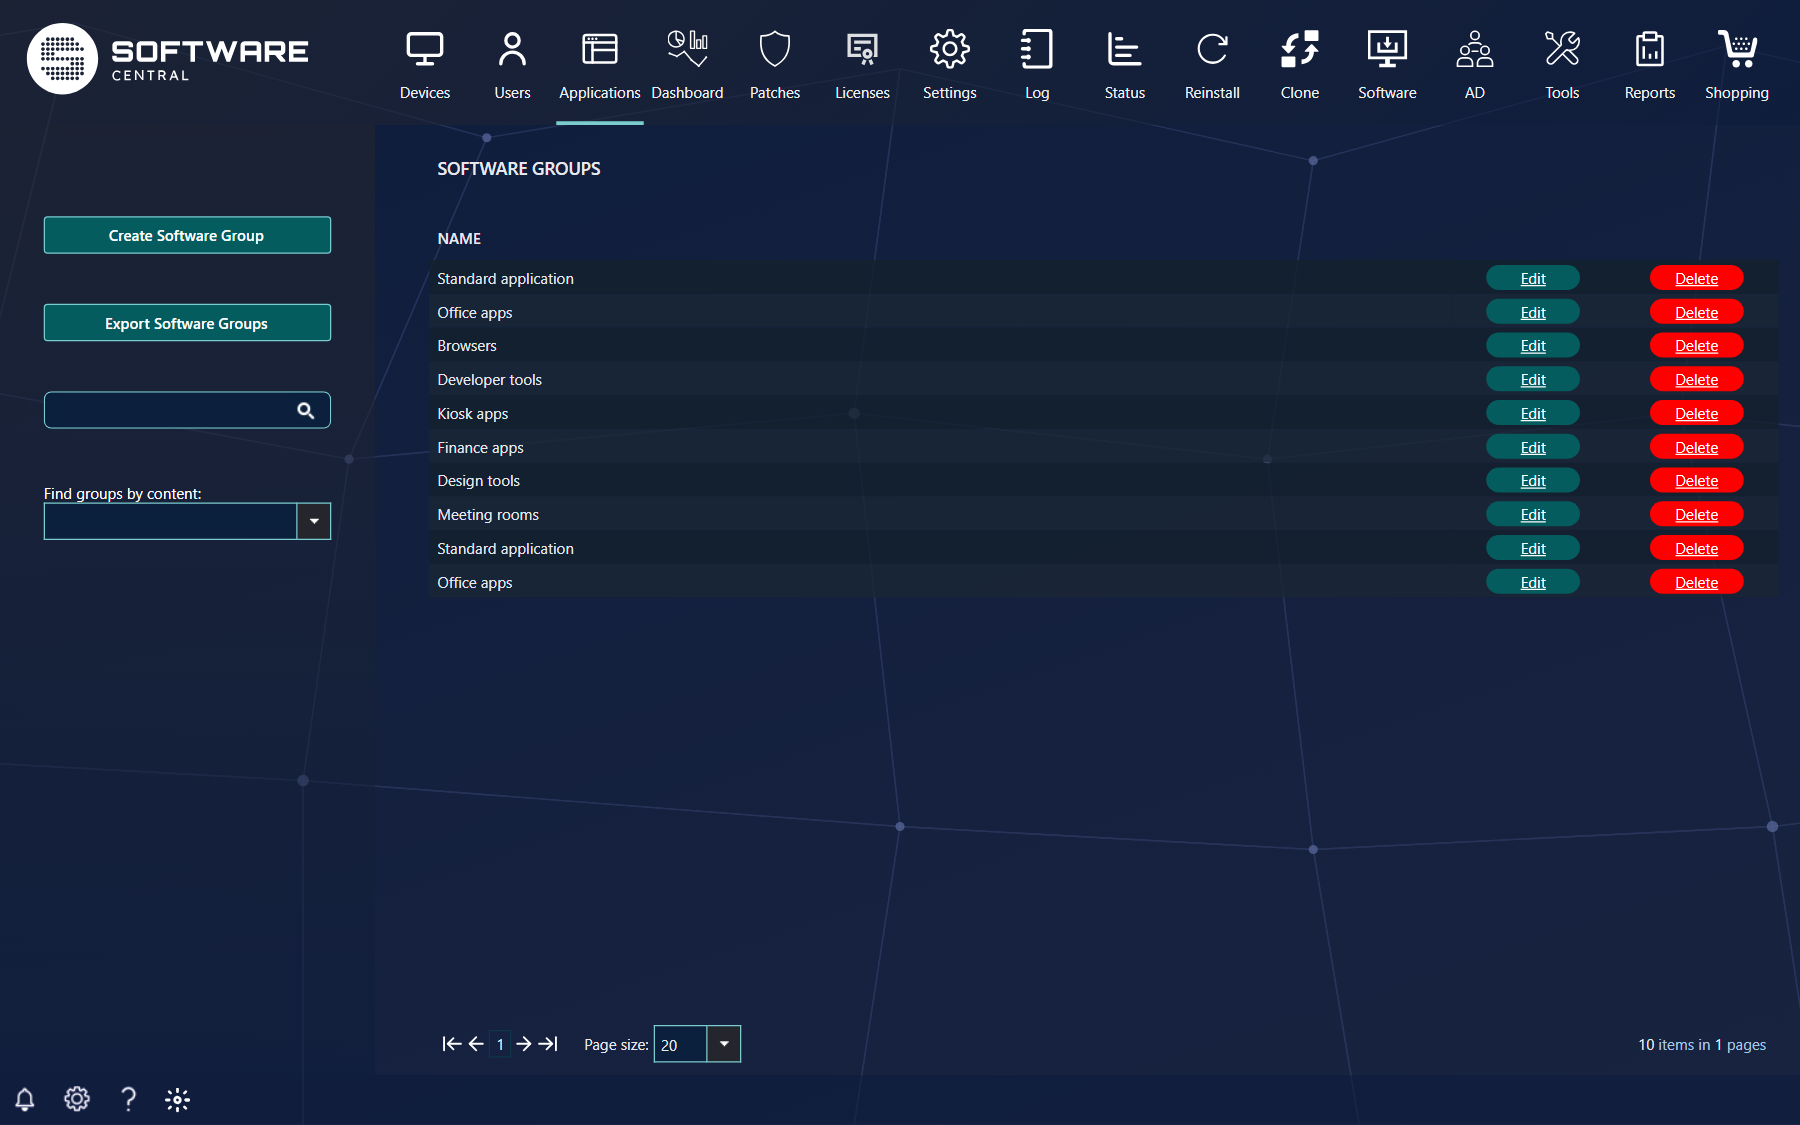
| Control | What it does |
|---|---|
| Create Software Group | Opens the window for a new group. |
| Export Software Groups | Downloads an XML file (SoftwareGroups.xml) with the groups you can see and the software in each, in install order. |
| Search | Type part of a name and press Enter; each value becomes a token and narrows the list. |
| Find groups by content: | Pick an application or package and the list shows only the groups that contain it. The choice is kept until you clear it. |
| Grid | The Name (click it to edit), an Edit button and a Delete button. You only see the groups your security role may use. |
| Red ! column | Shown when the licence module is enabled and a group contains software that has no licences left or whose licence has expired. Hover over the ! to see which software: No available licenses for: or Licenses is expired for:. |
A scheduled installation of a Software Group is listed in Edit Schedule, but it cannot be deleted there.
3 Create Software Group
To create a Software Group, click on the ”Create Software Group” button in the left-hand side menu. A new window will open:
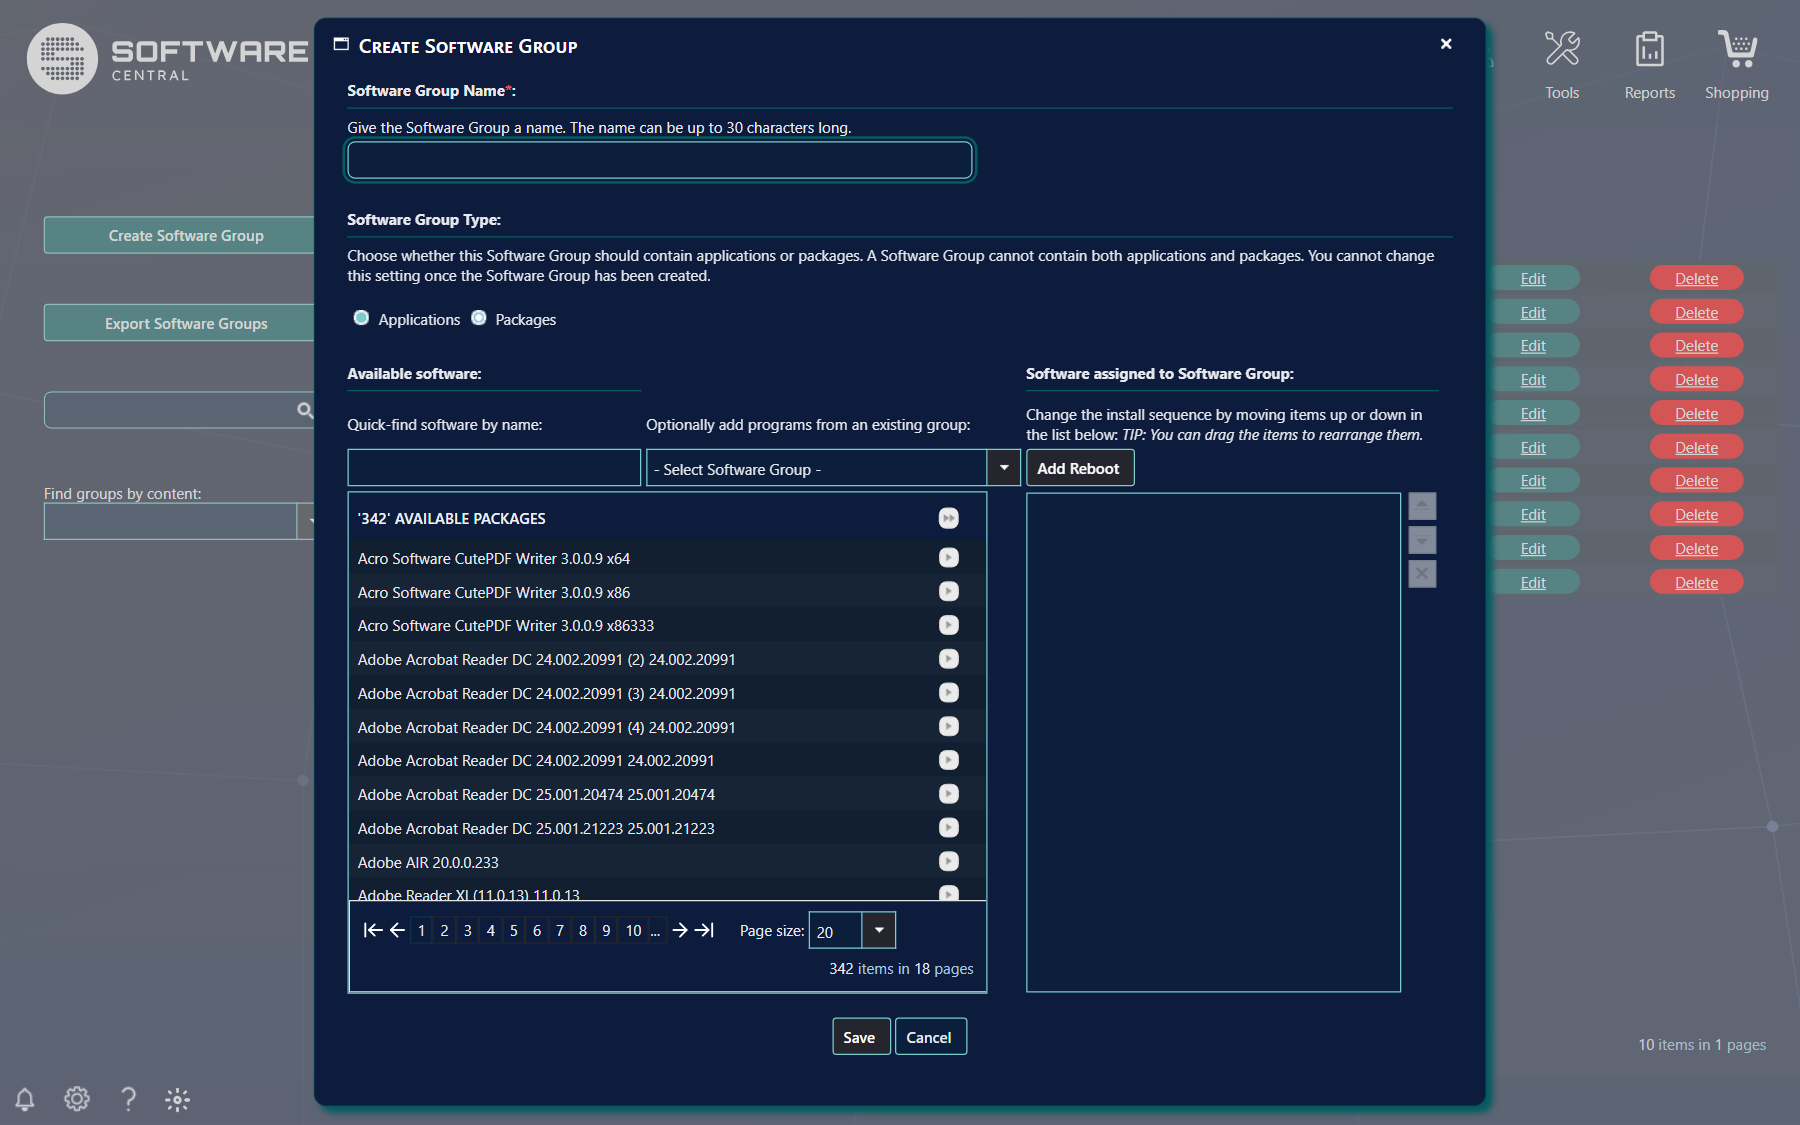
Start by giving the Software Group a name (Software Group Name, required). Names must be unique, and there is a length limit that is a few characters shorter for groups of packages than for groups of applications; the field stops you when you reach it.
Next, determine if the Software Group should be made of applications or packages (Software Group Type: Applications or Packages; the choice is only offered for SCCM 2012 and later):
| Part of the window | What it does |
|---|---|
| Available software / Quick-find software by name | Lists the software you can add. Type in the box to filter the list. |
| Optionally add programs from an existing group | Use the drop-down box to add packages from an existing Software Group. (This will remove the currently selected packages from the list.) Only shown when creating. |
| Move buttons | Add software to the Software Group with the move buttons. Note that the button in the header, will add all the packages currently in the “Available list”. |
| Software assigned to Software Group | In the list to the right, the order of the packages are displayed. Use the right-hand side buttons to change the order or remove a package from the Software Group. You can also use drag and drop to rearrange the software. |
| Add Reboot | Adds a REBOOT entry to the list, so the computer restarts at that point in the sequence. Only shown if Enable Reboot Support is ticked under Settings › SCCM › Packages. |
| Save | Creates the group. A group needs at least one item, otherwise you see No packages selected or No applications selected. If the name is taken: Software Group name already exists. |
4 Edit Software Group
Click on the ”Edit” button next to the Software Group you want to edit (or click its name).
A new window will open with the same lists. From this window, you can add or remove packages and change the installation order.
Note that you cannot change the Software Group name or change type from applications to package or packages to applications.
If your administrator has enabled Remove application from software groups when retiering, retiring an application in Application Management also removes it from all software groups; the Retire window lists the groups first. The application is not added back if you reinstate it.
5 Delete Software Group
To delete a Software Group, click on the ”Delete” button next to the desired Software Group:
A confirm dialog will popup (Do you want to delete followed by the name) before the Software Group is removed.
Click on the "Delete" button to remove the Software Group. For a group of packages this also removes the task sequence and variables SoftwareCentral created for it.
Current installations won’t be affected by deleting a Software Group.
6 See also
7 Best practice
- Copy an existing group (Optionally add programs from an existing group) instead of building similar groups from scratch.
- Check the red ! in the list before deploying a group: it means some software cannot be installed for licence reasons.
- Use Find groups by content before retiring, replacing or deleting software, to see which groups are affected.
- Use Export Software Groups to keep a copy of the groups before bigger changes.