1 Open the interface
This interface can be found under the Applications menu.
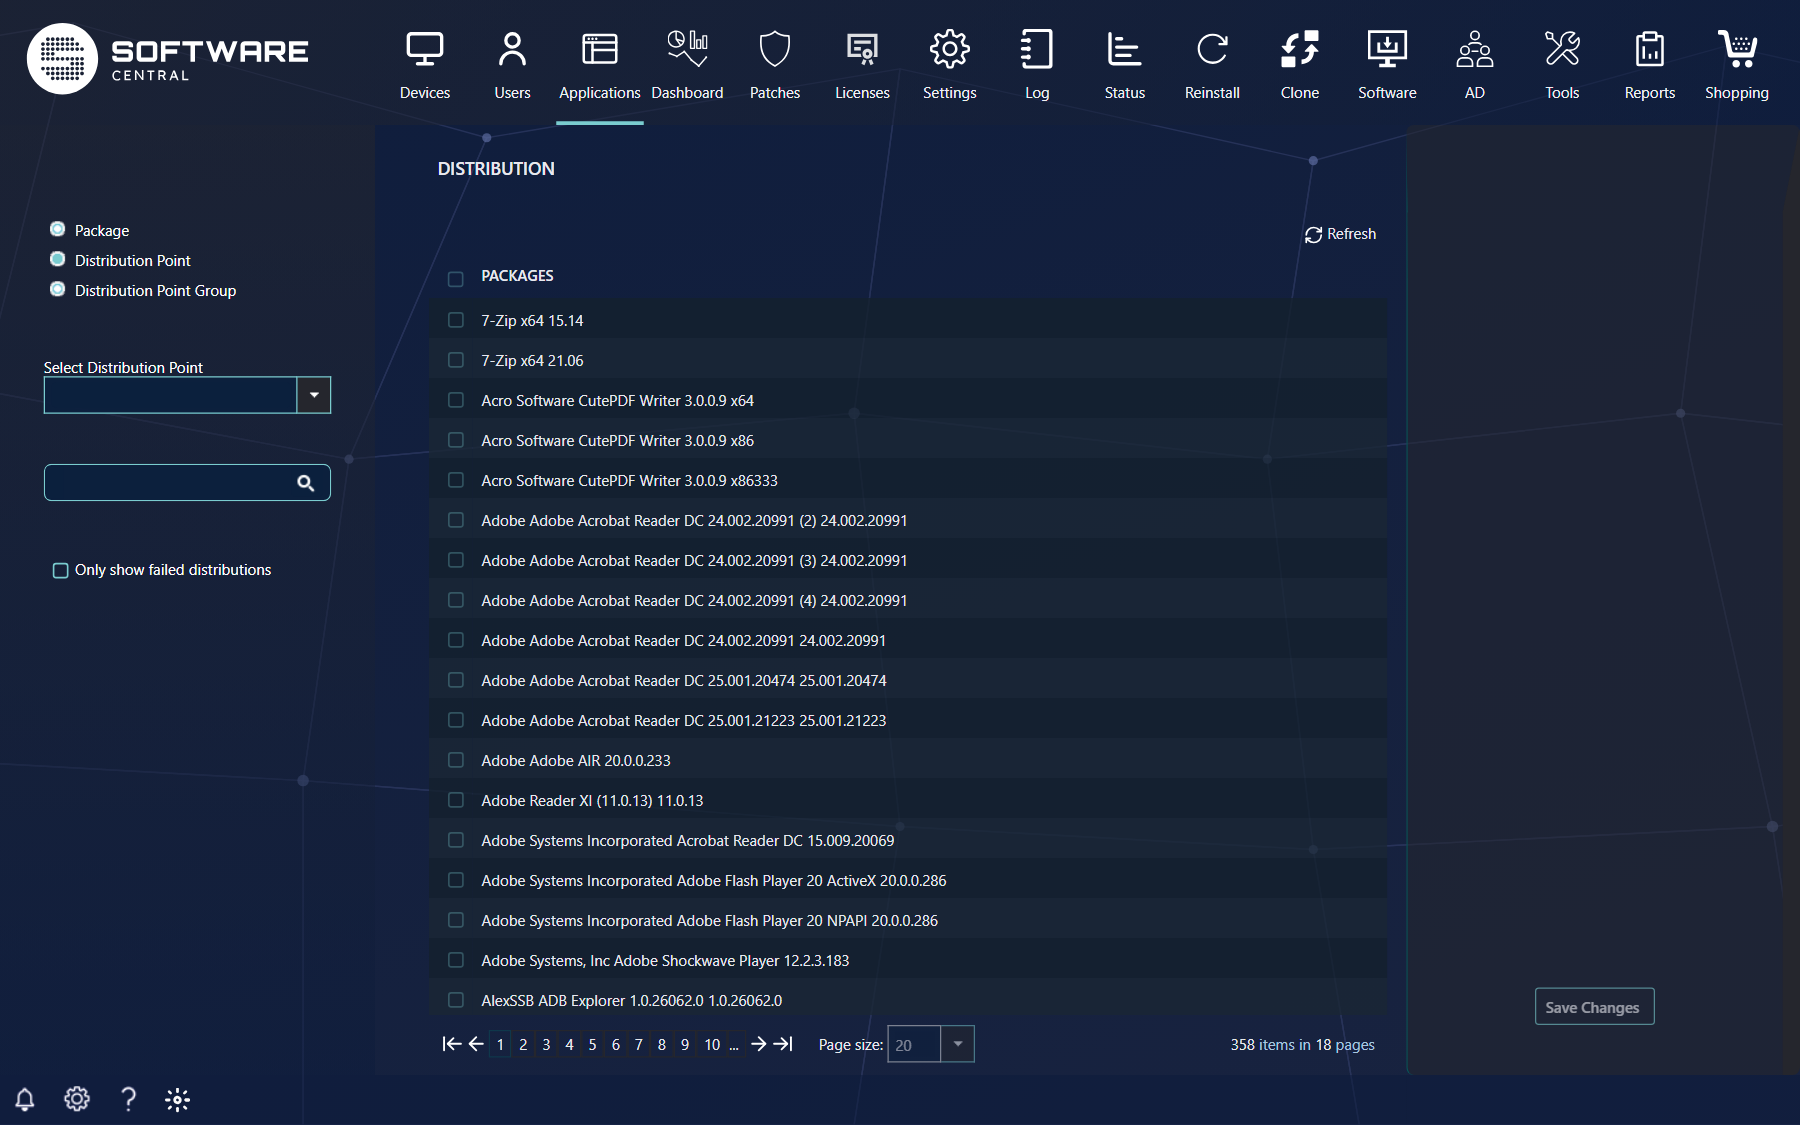
The interface can distribute one package to many distribution points or groups, or many packages to one distribution point or group.
2 The three views
Start by selecting Package, Distribution Point or Distribution Point Group in the left menu.
| View | What you can do |
|---|---|
| Package | Distribute a package to multiple distribution points or distribution point groups. You can also see where the package is distributed and get the content status. |
| Distribution Point | Distribute multiple packages to a distribution point. You can also see all packages currently distributed to a distribution point and get the content status. |
| Distribution Point Group | Distribute multiple packages to a distribution point group. You can also see the content status for each package. |
3 Distribute multiple packages to a Distribution Point
Start by selecting a distribution point from the Select Distribution Point box in the left menu.
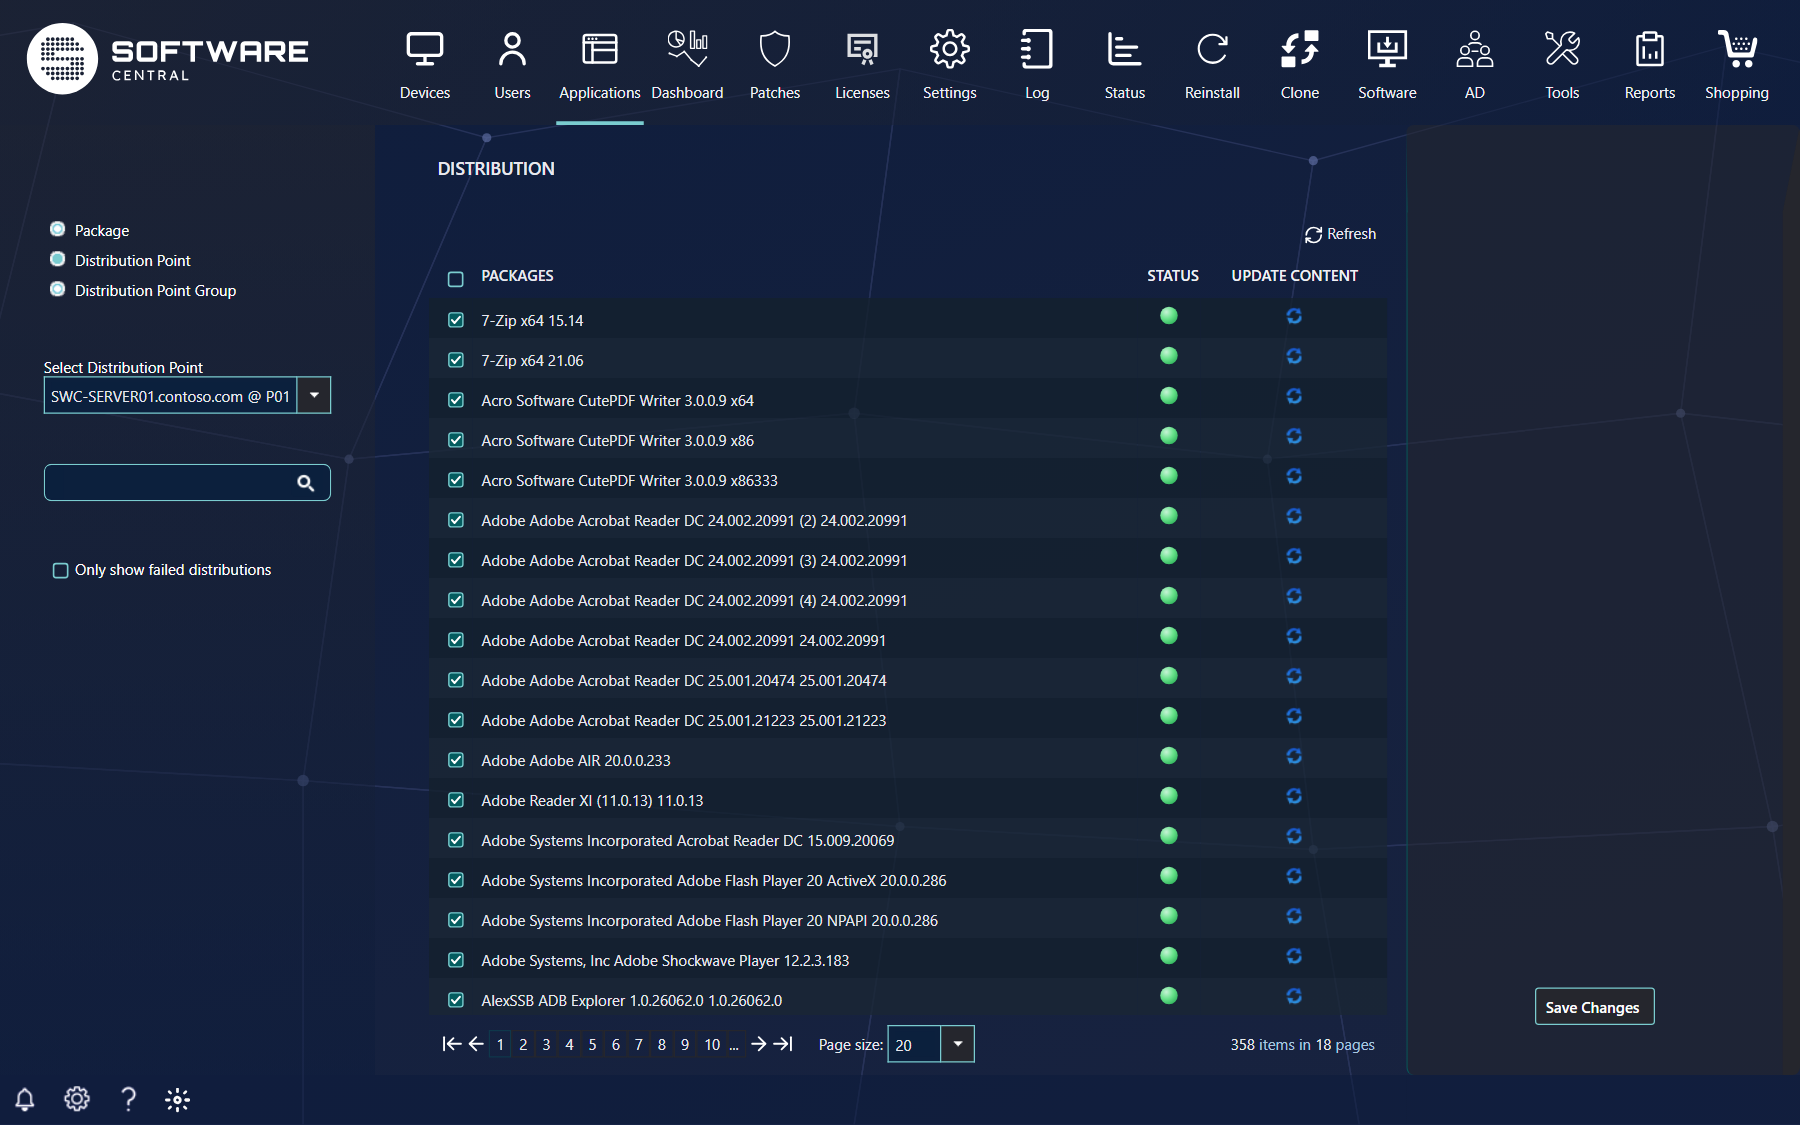
The checkboxes next to each package indicate whether or not the package is assigned to the distribution point. Check a package to add it to the distribution point, and uncheck a package to remove it from the distribution point.
You must click Save Changes before the packages are distributed.
To the right of each package there are two icons: a status icon and the Update Content icon. See sections 6 and 7.
4 Distribute a package to multiple Distribution Points
Choose Package from the left menu, then select the package from the Select Package box.
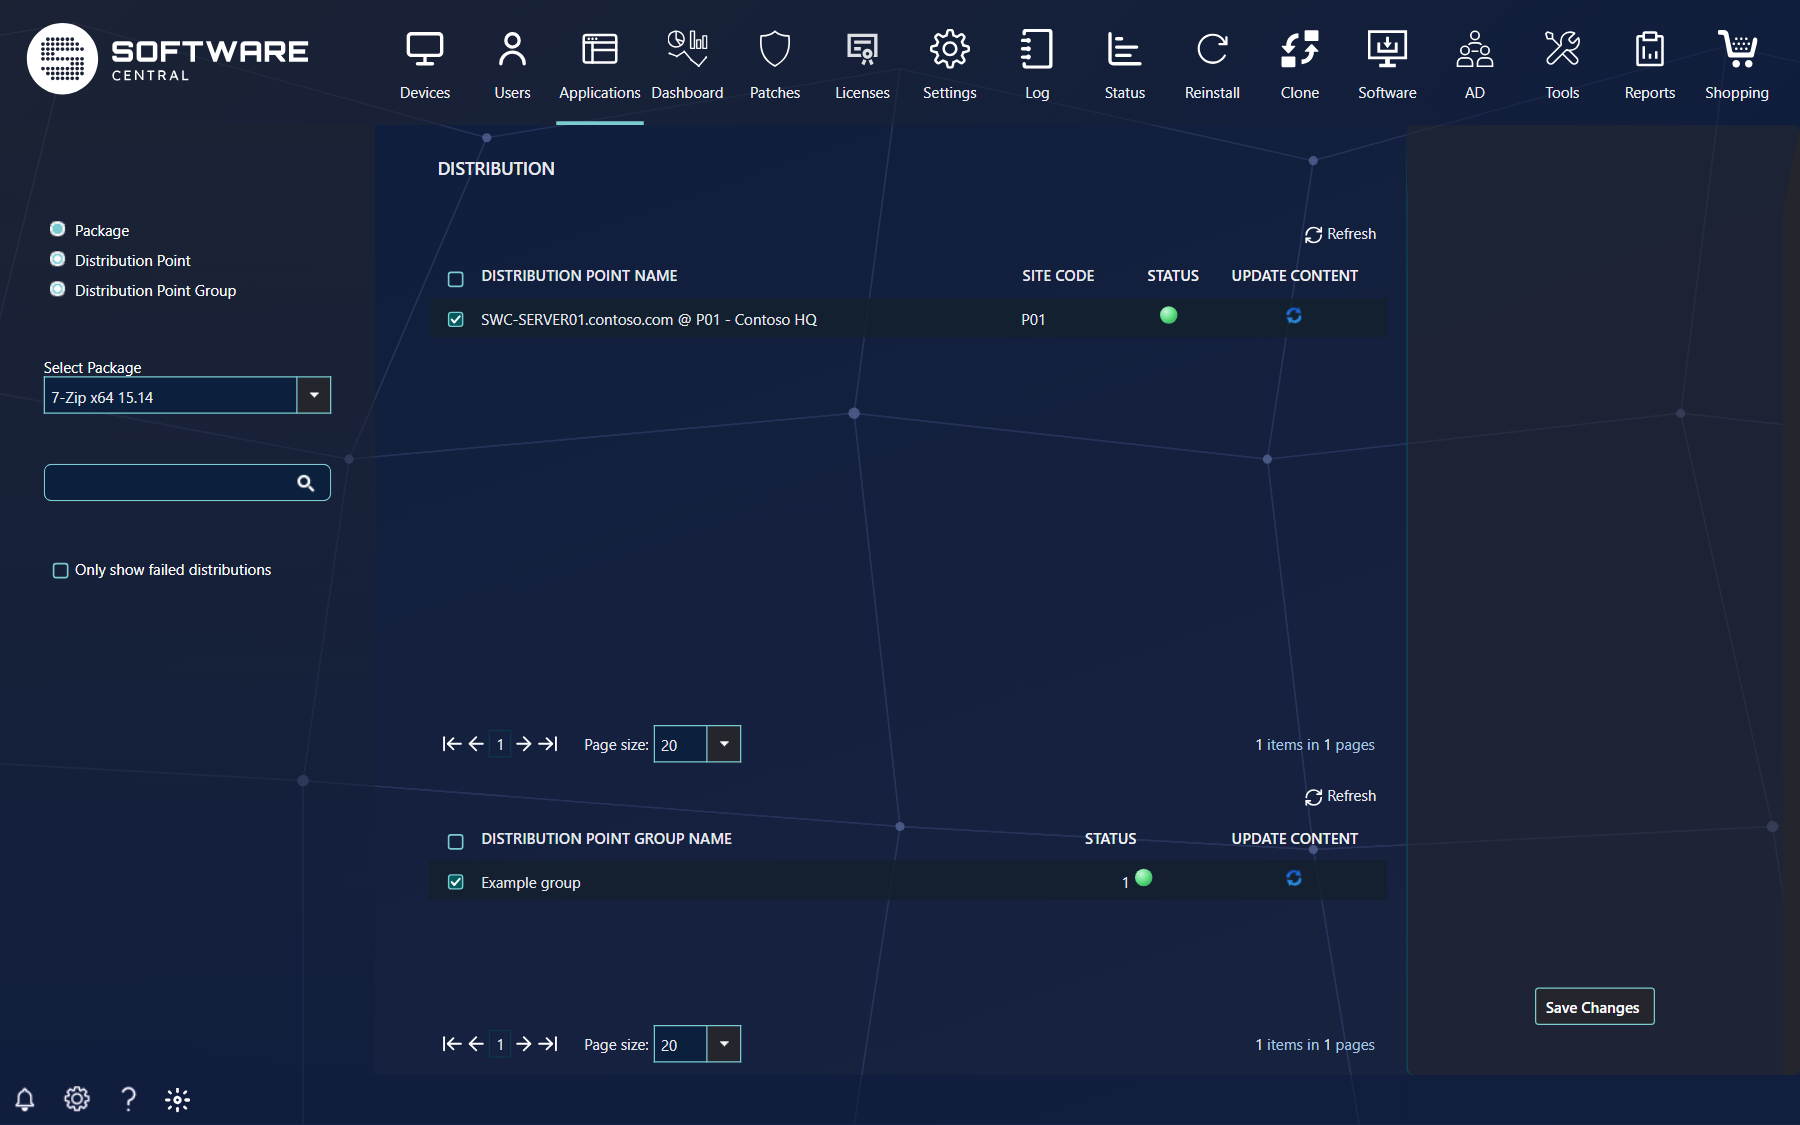
The checkboxes next to each distribution point and distribution point group indicate whether or not the package is assigned to that distribution point or group. Check a distribution point to add the selected package to it, and uncheck a distribution point to remove the package from it.
You must click Save Changes before the package is distributed.
To the right of each distribution point or group there are two icons: a status icon, and the Update Content icon.
5 Distribute multiple packages to a Distribution Point Group
Choose Distribution Point Group from the left menu, then select the group from the Select Distribution Point Group box.
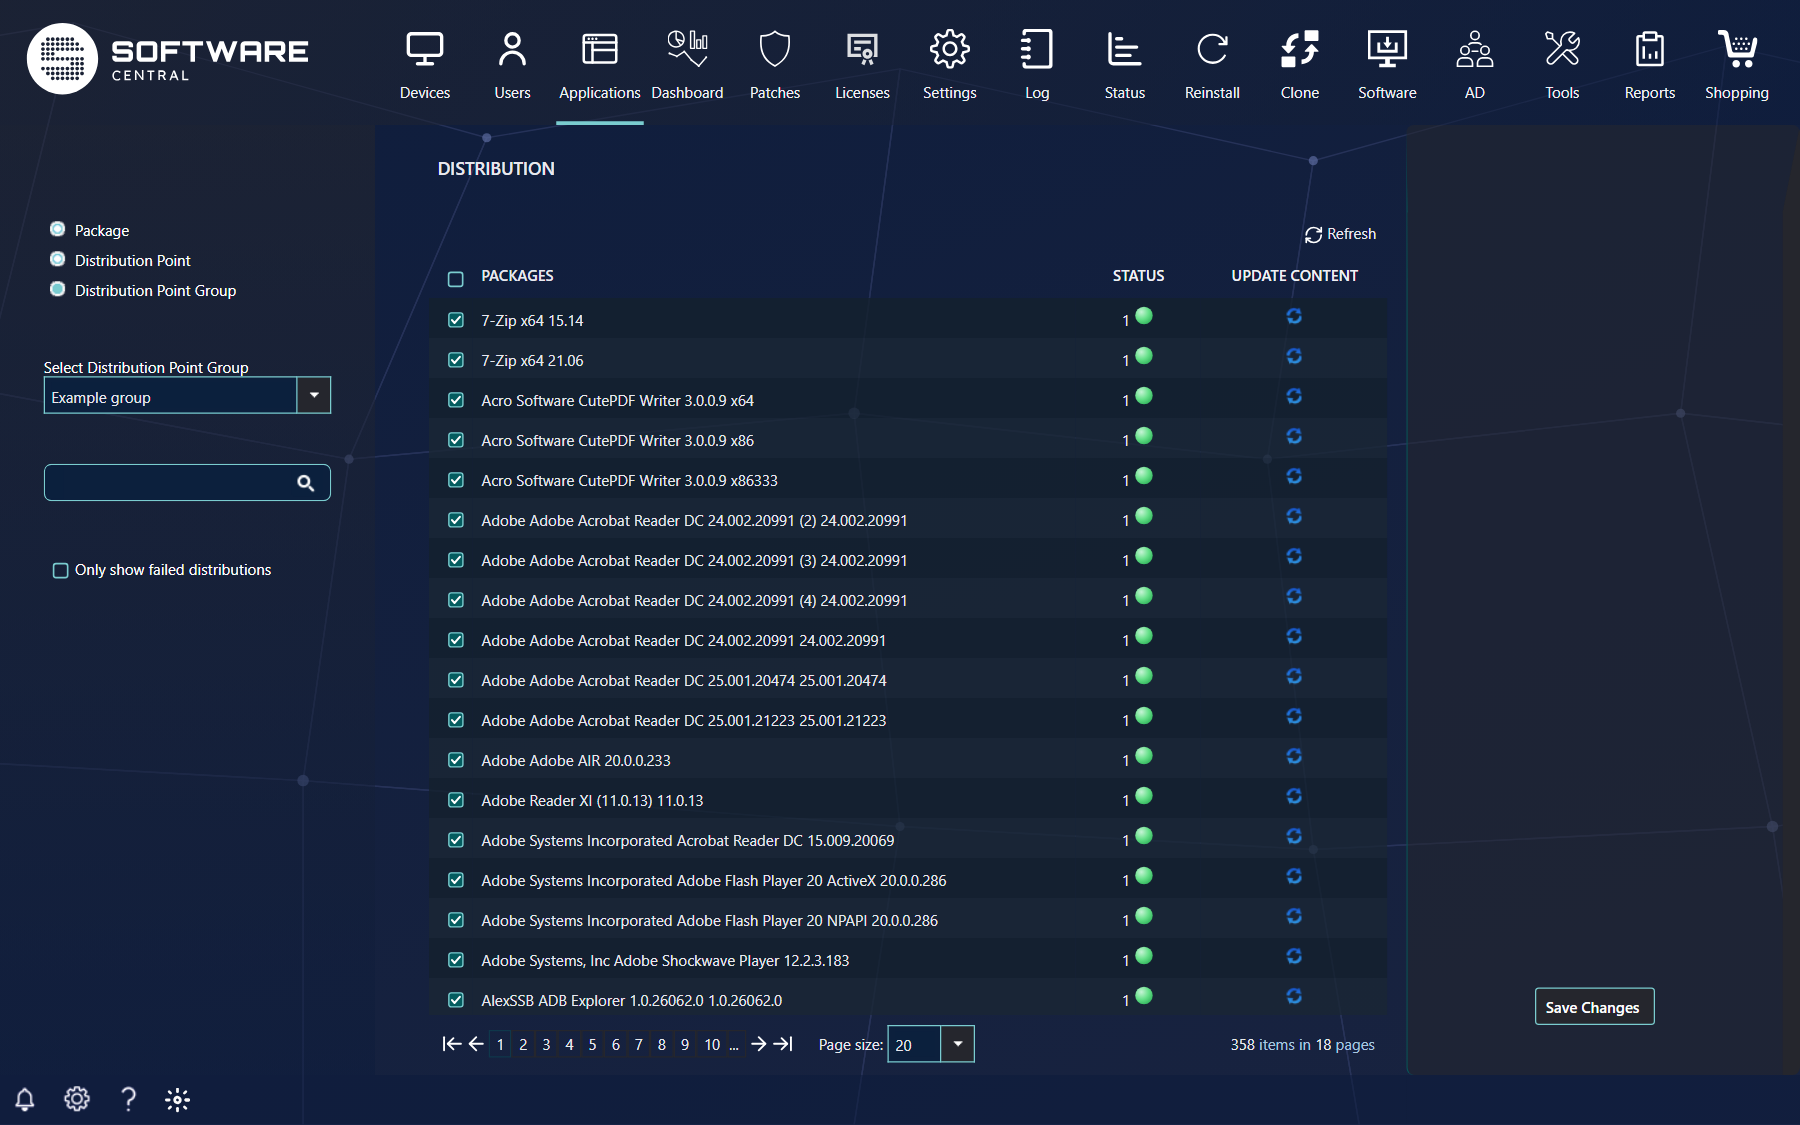
The checkboxes next to each package indicate whether or not the package is assigned to the distribution point group. Check a package to add it to the group, and uncheck a package to remove it from the group.
You must click Save Changes before the packages are distributed.
To the right of each package there are two icons: a status icon and the Update Content icon.
6 Status icons
The status icon shows the result of the last distribution. It can be green, yellow or red.
| Icon | Meaning |
|---|---|
| Green | Success. |
| Yellow | Pending or unknown. |
| Red | Error. |
Hover the mouse over the status icon to get a detailed status message. When a package is distributed to several targets, a number next to the icon shows how many of them have that state.
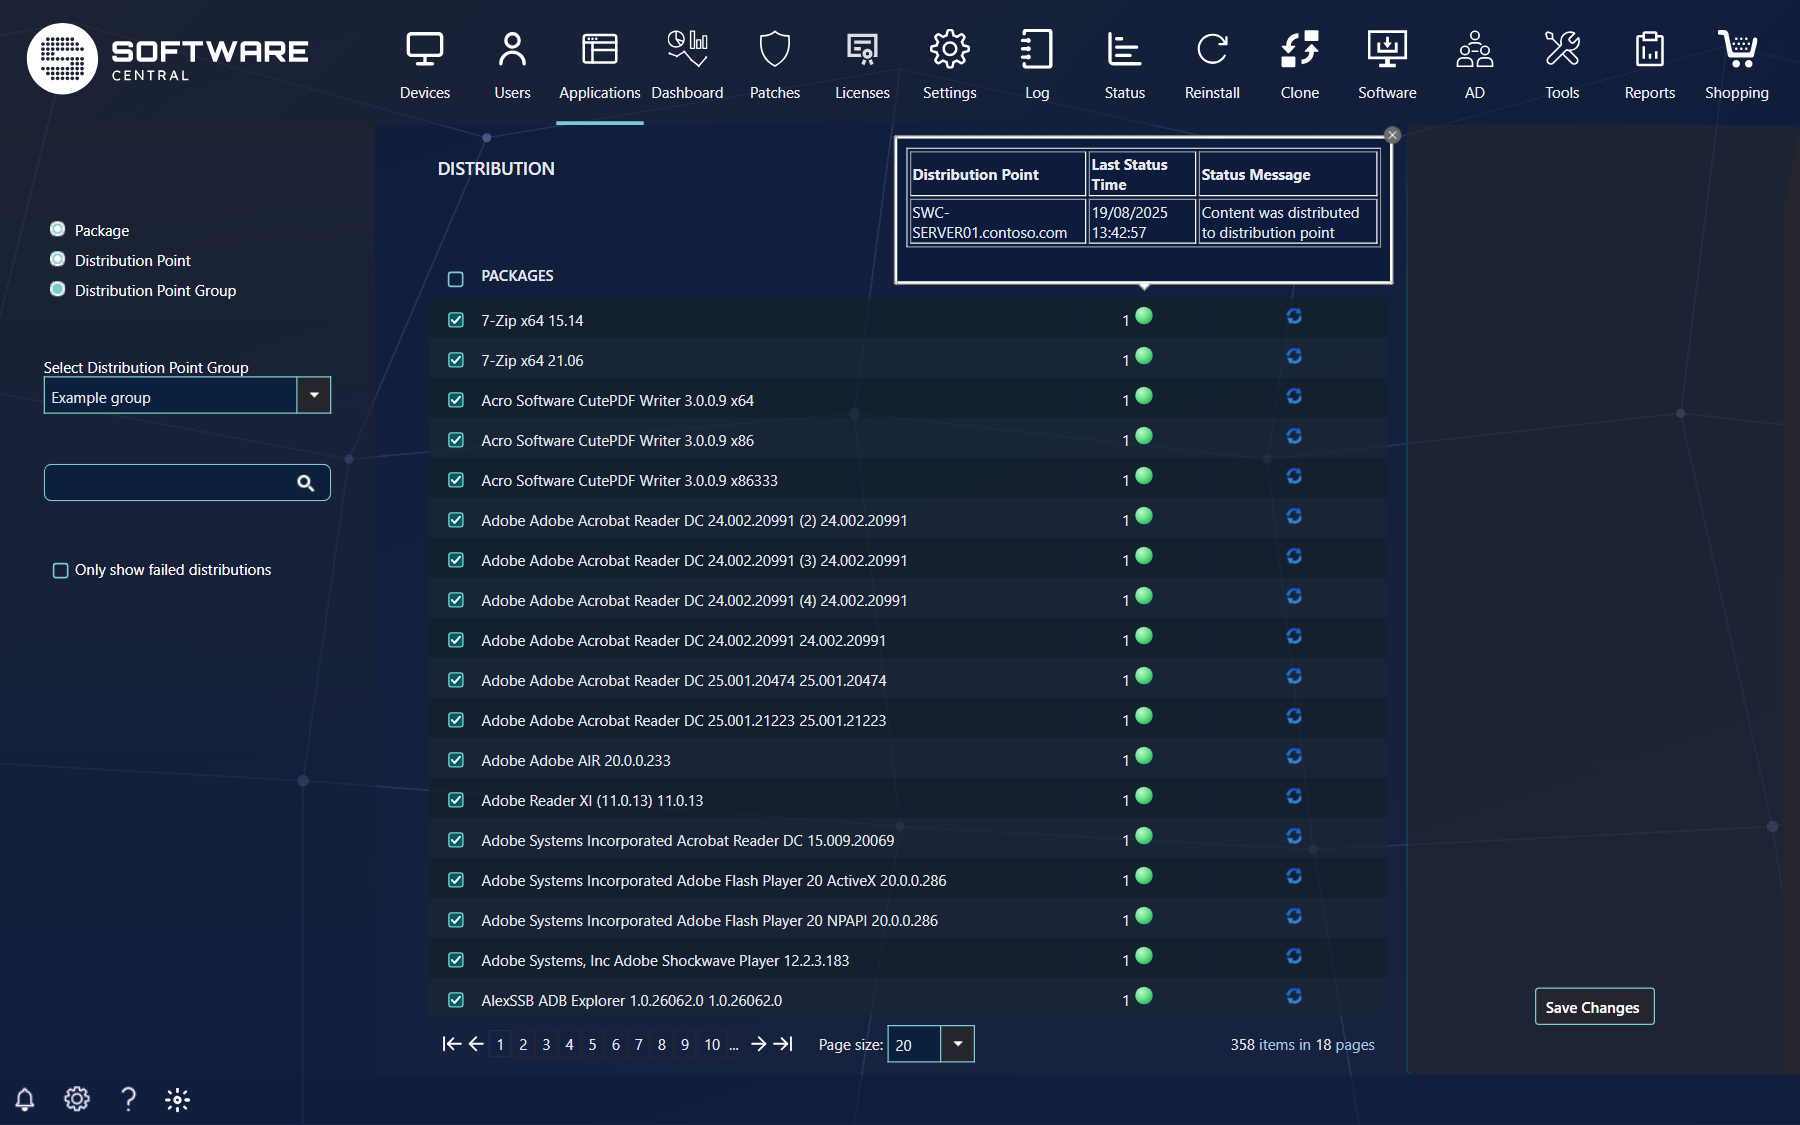
To see only the packages with an error, tick Only show failed distributions in the left menu.
7 Update Content
The blue recycle icon updates the package content on the selected distribution point, or on the distribution points in the selected group.
The content is updated immediately, so you do not need to click Save Changes afterwards.
The recycle icon only appears for a package that is already distributed to that target. If you have just ticked a new package, save first.
8 Best practice
- Click Save Changes before you leave a view. Only the saved ticks are distributed. A tick you made but did not save does nothing.
- Use Update Content after the source of a package changes. It sends the content again at once, so it does not need Save Changes. Use it on the distribution point or group that needs the new content.
- Check the status after you save. Hover over the icons to read the messages. Use Only show failed distributions to find the failed ones quickly.
- Set the defaults for new packages. New packages and applications that are not created from a template start with the distribution points and groups set on Distribution Settings.
9 Troubleshooting
| Symptom | Cause | What to do |
|---|---|---|
| "This application has no content and cannot be distributed." (tooltip on the locked check box) | The application has no content, so there is nothing to distribute. | Add content to the application, then distribute it. |
| A red status icon | The last distribution failed. | Hover over the icon and read the status message. Fix the cause on the distribution point, then click the Update Content icon. |
| A yellow status icon that does not change | The distribution is still pending, or its state is unknown. | Wait for the distribution to finish. If it stays yellow, check the distribution in the Configuration Manager console. |
| A ticked package is not on the distribution point | Ticks are only distributed after Save Changes. | Click Save Changes. |
| "Failed to update distributed content at site" in the Log | The content update failed. The Log entry holds the error. | Open the Log entry, read the error, and fix it before you try Update Content again. |
| No tick boxes, no Save Changes button, or no status and update columns | Your security role does not include the rights for changing the distribution, updating content or viewing the status. | Ask your SoftwareCentral administrator to check your security role. |
See also: Distribution Settings · Package Management · Assign Packages to Security Groups